Origami Kimono
©Anne Rita Taylor 2016
I love these Origami Kimonos - I have used them on greeting cards for birthdays, anniversaries, thinking of you plus bookmarks and place cards at dinner parties.

3. Measure 2 1/4 inches from the top and fold back.
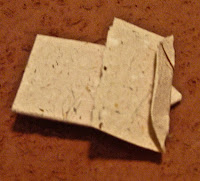
4. Measure 4 3/4 inches from the top and fold back again as in photo.
6. Tricky part! Fold top of each side to make a hood as pictured, helps if you put your finger inside the fold.
I love these Origami Kimonos - I have used them on greeting cards for birthdays, anniversaries, thinking of you plus bookmarks and place cards at dinner parties.
Supplies:
Handmade paper 2 inches by 7 inches
Bone folder, scissors and ruler
The handmade paper I used - from a 5 by 7 inch screen - I cut off the lovely deckle edges since the Kimono looks better with straight edges and is enough for two Kimonos.
- Fold top 1/4 inch and fold over again - this is the start of the all important collar.
- The middle of the top - where you folded - is 1 inch and fold down from this mid point to make the collar.

3. Measure 2 1/4 inches from the top and fold back.
4. Measure 4 3/4 inches from the top and fold back again as in photo.
5. Fold sides up to collar areas, as pictured.
6. Tricky part! Fold top of each side to make a hood as pictured, helps if you put your finger inside the fold.


I love origami folding, these are super cute!
ReplyDeleteThanks Sandee! They are so easy too!
DeleteLove the shirts! Will have to make some for the "guys".
ReplyDeleteLove and light,
Michele
Thanks Michele!
DeleteThese are so cute! I can see lots of wonderful cards made with these.
Delete