Posts

Showing posts with the label envelope template

Card set by Steph

Image
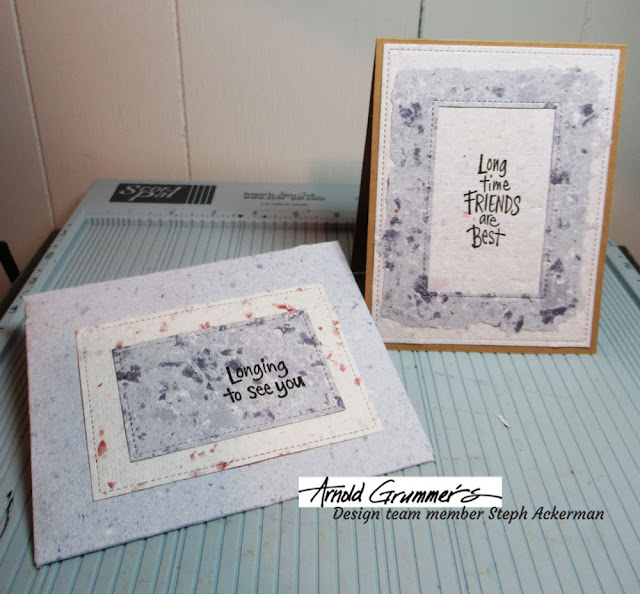
Hi everyone, Steph Ackerman here today with a new project using handmade papers created with the Arnold Grummer Papermaking Kit .  It's so easy to make your own paper.  Use a variety of papers to create amazing one of a kind designs.  Use the Large Envelope Template to create the envelope.  Using the ScorPal you can create the fold lines for the perfect envelope! Using Stampendous Spring Border Cutting Dies , die cut the edges for a nice scalloped effect.  Handmade papers die cut easily in one pass! Using additional handmade papers, die cut assorted panels for the card and envelope. Use the Stampendous Giraffe Stamp and Die set with Versafine Onyx Black ink to stamp the phrases. Create a card from kraft cardstock then adhere the panels. Add the additional panels to the envelope. Thanks for stopping by.

Handmade Confetti stationery

Image
Happy New Year 2019! When I think of bringing in the New Year I think of party hats, streamers and of course confetti which inspired my confetti stationery.  They are perfect for writing a letter to anyone celebrating a happy occasion or just for celebrating your friendship with them. Using a hole punch I created some confetti from random scraps of handmade paper that were lying around in my stash which is my inspiration for this project.  I love it when I am inspired by scraps; nothing goes to waste! For my photo tutorial, I am using the  Arnold Grummer  Large Envelope template  along with the  Pour Handmold .  The first step is creating your pulp and pouring it into the mold that holds the template. Once I pulled the mold out of the water and removed the deckle I set it on a dedicated for papermaking baking tray so that the excess water that drains off the wet sheet will not make a mess and run over t...

How to create fluid borders

Image
I love to make stationery and I have been trying out some different designs lately, like making fluid borders the Arnold Grummer way! His paper making kits are the bomb and they will get you making your own paper quickly and easily. The first thing we all do is when we are making handmade paper is to decide what color paper we are going to recycle. There is the choosing of scraps we collected to tear into tiny stamp size pieces and then when we are making a border, we need two colors! The joy of designing your own paper is all about style! AND if you add some Gold Dust then you are adding pizazz to your paper! For this project, I made 2 different sets of stationary with matching envelopes but it's the same steps for both colors. First thing I did was to use my pour mold to create the base of the paper and then while the paper is still sitting in your vat of water you will want to squirt in your colored pulp along the side of the deckle. This ensures a fluid look...

How to create watermarks in your handmade paper

Image
Today I am excited to share with you just how simple it is to create a watermark  in your handmade paper.  I have to admit, I haven't made paper in a while and I needed a fun project to jumpstart me back in action. Nothing inspires me more than watching the man himself, Arnold Grummer demonstrate how it's done by watching his  video s . You can also get his book Trash to Treasure with great photos and clear instructions! He has a way of making everything look so easy so I thought I'd give it a whirl.  WOW! I am hooked on this decorative technique!  InstaGram Begin by assembling your materials for basic papermaking: torn paper water plus a blender plastic tub  papermaking screen, screen support grid, cover screen Pour or Dip handmold -  (I'll be using the large pour Handmold ) 2-Up or Deckle Divider Large Template plastic letters A2 Envelope Large Template (Watch this  video  for how to make a basic s...