Posts

Showing posts from August, 2012

Matchbook Mini

Image
This mini matchbook album is the perfect project to use small pieces and scraps of your handmade paper. I started with this lightweight chipboard matchbook. Next, I covered each page and the matchbook cover with a different piece of handmade paper and inked the edges of each page. After some experimentation I discovered that the best adhesive to adhere the paper to the chipboard is  USArtQuest's Great Tape . I dug into my stash to find stamps and embellishments to decorate each page. The pink heart on the cover was made using Arnold Grummer's Three Hearts Template. Here's the finished matchbook mini album. Visit my Create & Craft blog to see more of my projects.

Sunflower Vase

Image
  Try painting sunflowers -- with paper pulp!       Watch the video to see how to cover a plastic bottle with handmade paper and paint on sunflowers.

Favorite Things Fan Book With Pumpkin Spice Paper

Image
I try to surround myself with things that inspire me, bring me joy, comfort me, and make me peaceful. Whether they be photos, quotes, blessings, scents - I keep them close, a special place of respite and renewal, safe from the chaos of this world. Today's project is based on that idea. A little book filled with good things, like favorite Bible verses, and special blessings - formatted in an easy to read "fan" style. The paper is handmade, and infused with pumpkin spice tea leaves for a comforting, warm and spicy scent. I used the Arnold Grummer Papermill Complete Kit and a few Bigelow Pumpkin Spice Tea bags to make the handmade paper. For a basic tutorial on how to make handmade paper, go to the Arnold Grummer Papermaking Blog and let Mr. Grummer show you how easy it is. While you're there visit the Arnold Grummer website , and take advantage of the BEST DEAL of the summer - 15% off your entire order! Sale items excluded. Use promo code AGIS89 at checkout. Hur

Handmade Album Cover - Plus Giveaway!!

Image
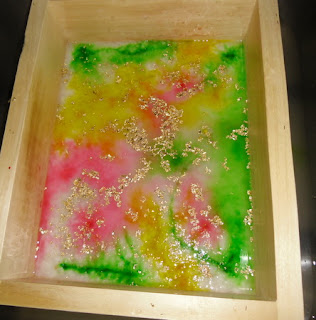
Hi everyone I want to share my next Arnold Grummer Project.  I made some paper for an album cover.  I used the AG kit and added some of the inclusions and some alcohol ink.  You can literally add anything into your paper mixture to get your desired look.  Awesome huh?  Be sure to become a follower and leave a comment here and you will automatically be entered into the drawing for my 1001 Follower Giveaway...

Picture Frames for Vintage Photos

Image
One of my favorite things is vintage photos.  So when I came across two photos of my mother when she was a child I was head over heels and wanted to find the perfect way to display them.  This is what I did. I started with two picture frame kits from Arnold Grummer.  These hold 3"x5" photos. To cover the frames I used some hand made paper that I made with my medium pour mold . I made the paper using tissue paper, rosebuds , silver dust , and blue  angel wings. The photo frame kit comes in 4 easy to assemble pieces. To assemble the picture frame, first you glue the U shaped piece (this holds your photo) on to the backside of the front of your frame. Then put your frame face down on your paper.  Adhere with glue.  A glue stick works great for this. Cut around the outside and cut out the center. Then add your photo. Then using a glue stick add the back to your frame and attatch the stand to the back.  For this project

~The Art & Aroma Of Creating Beautiful Handmade Botanical Papers~

Image
~The Art & Aroma Of Creating Beautiful Handmade Botanical Papers~  In the process of making the beautiful handmade papers with  Arnold Grummers Paper Making it  I decide to put a fun twist to it. Being a Nationally Certified Aromatherapist and herbalist, creating lovely handmade paper items with natural botanicals  and  wonderful scents was right up my alley!! So at the end of the paper making process with Arnold's easy to use paper making kit the last step was to add about 5-10 drops of your favorite essential oil  or  fragrance oil right in the water bath/screen area where your pulp sits. In my opinion it works just fine with the F.O so no need to use the more expensive essential oils unless for some reason you would like to! Keep in  mind though that any fragrance that includes "vanilla" will turn your paper a brown hue. But that still would be ok if you were looking for an old" vintage" look. So as you are ready to raise you

From the Heart Card

Image
Hello everyone! This folded heart card project is from my book Origami Card Craft and as an avid paper folder I had to see if the handmade pink paper I made using Arnold Grummer's Paper Mill Pro kit would fold and it certainly did! I was amazed that my large sheet of handmade pink paper actually withstood the repeated creases without cracking or tearing and now I am excited about making my own origami paper. Here is how I made the project: Supplies: 1 sheet 8 1/2" x 11" handmade paper. (It must be fairly thin and well pressed. See my last post on how to make the paper.) Rubber stamps from Club Scrap Glue Stick Silver iron on studs Stamp pads 1. Valley fold the left bottom edge of the paper to the right edge and crease. Unfold the paper. 2. Valley fold the right bottom edge of the paper to the left edge and crease. Unfold. 3. Turn the paper over and valley fold the paper at the intersection of creases. 4. Bring the folds together to collapse into a flat triangl