Posts

Showing posts with the label Mixed media

Thinking of You Card bySteph

Image
Hi everyone, Steph Ackerman here today with a new project using handmade papers created with the Arnold Grummer Papermaking Kit .  Using  one of the Arnold Grummer's Papermaking Kits , I created an assortment of handmade papers. Once the papers completely dried, I chose one to create with and cut it to 4" x 5 1/4".  I taped the  Bare Trees Meal Stencil from Stampendous on my handmade paper.  Using a pallet knife I  added modeling paste over the stencil. Carefully removing the tape, I removed the stencil while still wet.  I quickly rinsed off the stencil to remove any trace of the modeling paste. While still wet, I poured Stampendous Twinkle Glitter across the tree tops and put it aside to dry. For a touch of color, I spritzed Bamboo Leaves Fireworks! Shimmery Craft Spray along the bottom of the card. Using a scrap piece of handmade paper, I stamped a sentiment from Stampendous -  Encouraging Words - with Ve...

How to polish paper with a stone

Image
Do you like to read about other handmade paper artisans? Recently I read an article from the Monte Crisco Magazine on Master Papermaker Francesco Proietti and one line really caught my attention. "Finally, a rounded stone “polishes” the paper until it is flat and smooth." Now I'm all about learning things the old fashioned way albeit I might not prefer to do it all the time, I do like my modern ways too, just saying. However I enjoy a respite from the modern world every now and then and this technique just called to me to try. So I got out from my stash a sheet of one of my "perfectly imperfect" hand made papers that I created using the medium Dip Handmold . I wanted a rough sheet of paper to see if this would actually work. I planned on doing a bit of stamping on it so I drew out a grid that I intended to polish. I'm glad I chose a small space because it is a little labor intensive although not difficult. By rubbing the stone over the pap...

Altered Key with Tamiko

Image
Hello folks, Tamiko here.  For the last few weeks I have been looking at my stash of keys and I'm going to find a way to use them  or just toss them!!  Of course I found a way to use them!  How to make a paper cast:  Torn tissue papers and a few cups of water pulsed in the blender, creates a paper slurry.  I removed even more water by allowing the slurry to be processed through a strainer I found on the Arnold Grummer site. I've then prepared my mold by brushing it lightly with a release agent like olive oil. After the mold was prepped,  we place pulp in the mold very carefully pressing it deeply into all the crevices of the cast.  I removed more water by pressing sponge against the mold.  You can let the paper dry by placing it in the oven for 8 - 10 minutes on a low temperature or let it air dry, for a few hours. Once the cast is dry, you can decorate as normal. Thanks for stopping by the blog. I hope that seeing the paper casts ins...

Live the Life

Image
© Michele Emerson-Robert 2016 I love creating these inspirational mixed media pieces. They go together so quickly and are always a huge hit when I give them to a friend who needs some cheering up. I create several at a time, varying the colors and subject a bit. Sheets of thin handmade paper are a must for the base layer. Remember to always make extra to have on hand. Supplies ·        Amazing™ Mold Putty ·        Any of the Arnold Grummer® paper making kits ·        Blender, cello sponges and soft towels ·        A sunny window ·        Scraps of white/off white paper (think junk mail, etc.) ·        Scraps of white chip board to die cut (I used white food packaging) ·        Matboard scrap to emboss ·        Wick...

Spring Mixed Media Piece

Image
  I love spring, everything is new again. Grass is growing, leaves are growing on trees, flowers are popping up from the ground and new life is coming with the birth of baby birds, fawn, baby cows and every other animal is giving new life. I LOVE spring.    Our Plum tree is always the first to bloom and if we have a good rain when it is in full bloom, you just have to walk out the back door and the whole yard smells beautiful. When the flowers on that start to die, the apple/crabapple tree comes into full bloom. And what a beautiful site that is and then the front yard smells beautiful and then when that starts to die, we have other things that start to bloom. It seems there is something blooming all spring, I love it.    Today, I made a mixed media piece that I used paper castings on, they are leaves, of course. I am sure that most of you have heard the poem..... Trees By Joyce Kilmer I think that I sha...

Paper Casting

Image
Hello,  Ann here today from the Arnold Grummer Design Team and Annmakes .  I have been enjoying making paper castings lately with some new moulds that I received.  Paper casting can be done in several ways.  Today I am showing you some examples of using moulds and Cotton Linters. Cotton Linters are a wonderful fiber to create with as the end product results in a very white and delicate finish. However, the Cotton Linter fibres create a very strong natural bond while the fineness of the fibres takes on any details in the moulds almost perfectly.  Of course the moulds can also be used with a regular paper pulp or clay. To make the pulp all you need are a few squares of Cotton linter, some water and a blender.  Mix it all up and pour through a sieve reserving the cotton pulp and draining the excess water.  Then pressing the cotton into the mould of choice, packing it firmly, and letting it dry.  It is also possible to speed up the drying ...

Collage and Water Colour

Image
Hello, Ann here again with my handmade paper collage today.  I have a nice stash of handmade papers that I made a few weeks back using the Arnold Grummer Paper Making system.  I just love all the colours I got!..  What a fabulous way to turn trash into treasure.  Literally, I up cycled a bunch of junk mail into some great sheets. For today's project I used four of the sheets of paper I made to make a mixed-media collage.  I used to love cutting out and playing with paper dolls as a child and it seems that I still enjoy that today, but with a twist.  The twist being that I make my own now.  I hope you give this a try for yourself or maybe for a child (r the child in you).  It is fun. I used a large rubber cling stamp of a doll that I stamped onto three different colours of papers, Then with some scissors and Matte Medium I cut and assembled my doll. I used a fourth sheet as the background which I coloured up with some water colours...

Tag.. You're It with Tamiko..

Image
I have to say I didn't create any handmade papers today.. (insert - Awwwwe!)  Only because I have created a decent size stash to play with (Yeah buddy!!) Well for a very little while.  I mean.. do you EVER really have enough paper when you are a serious paper crafter? (smiles)  I wanted to play and color on my handmade papers.  I think when you art on top them they add such texture and detail, even before adding color.  Here is a tag I did.  It was such fun to play.. and watch as things as it came into fruition. The supplies I began with were only made possible after using any one of the   Arnold Grummer Paper Mill Kits  to create the papers of your dreams. (smiles)  After you have those, you then need: XL Manila Tag Prima, Bloom Girl Summer Stamp Ranger Archival Ink Pad- Jet Black Lindy's Stamp Gang Magicals -Autumn Leaves Sakura Water brush Helmar Craft & Hobby PVA Glue Embellishments Scissors Americana Mult...

Time for Fall the Mixed Media Way

Image
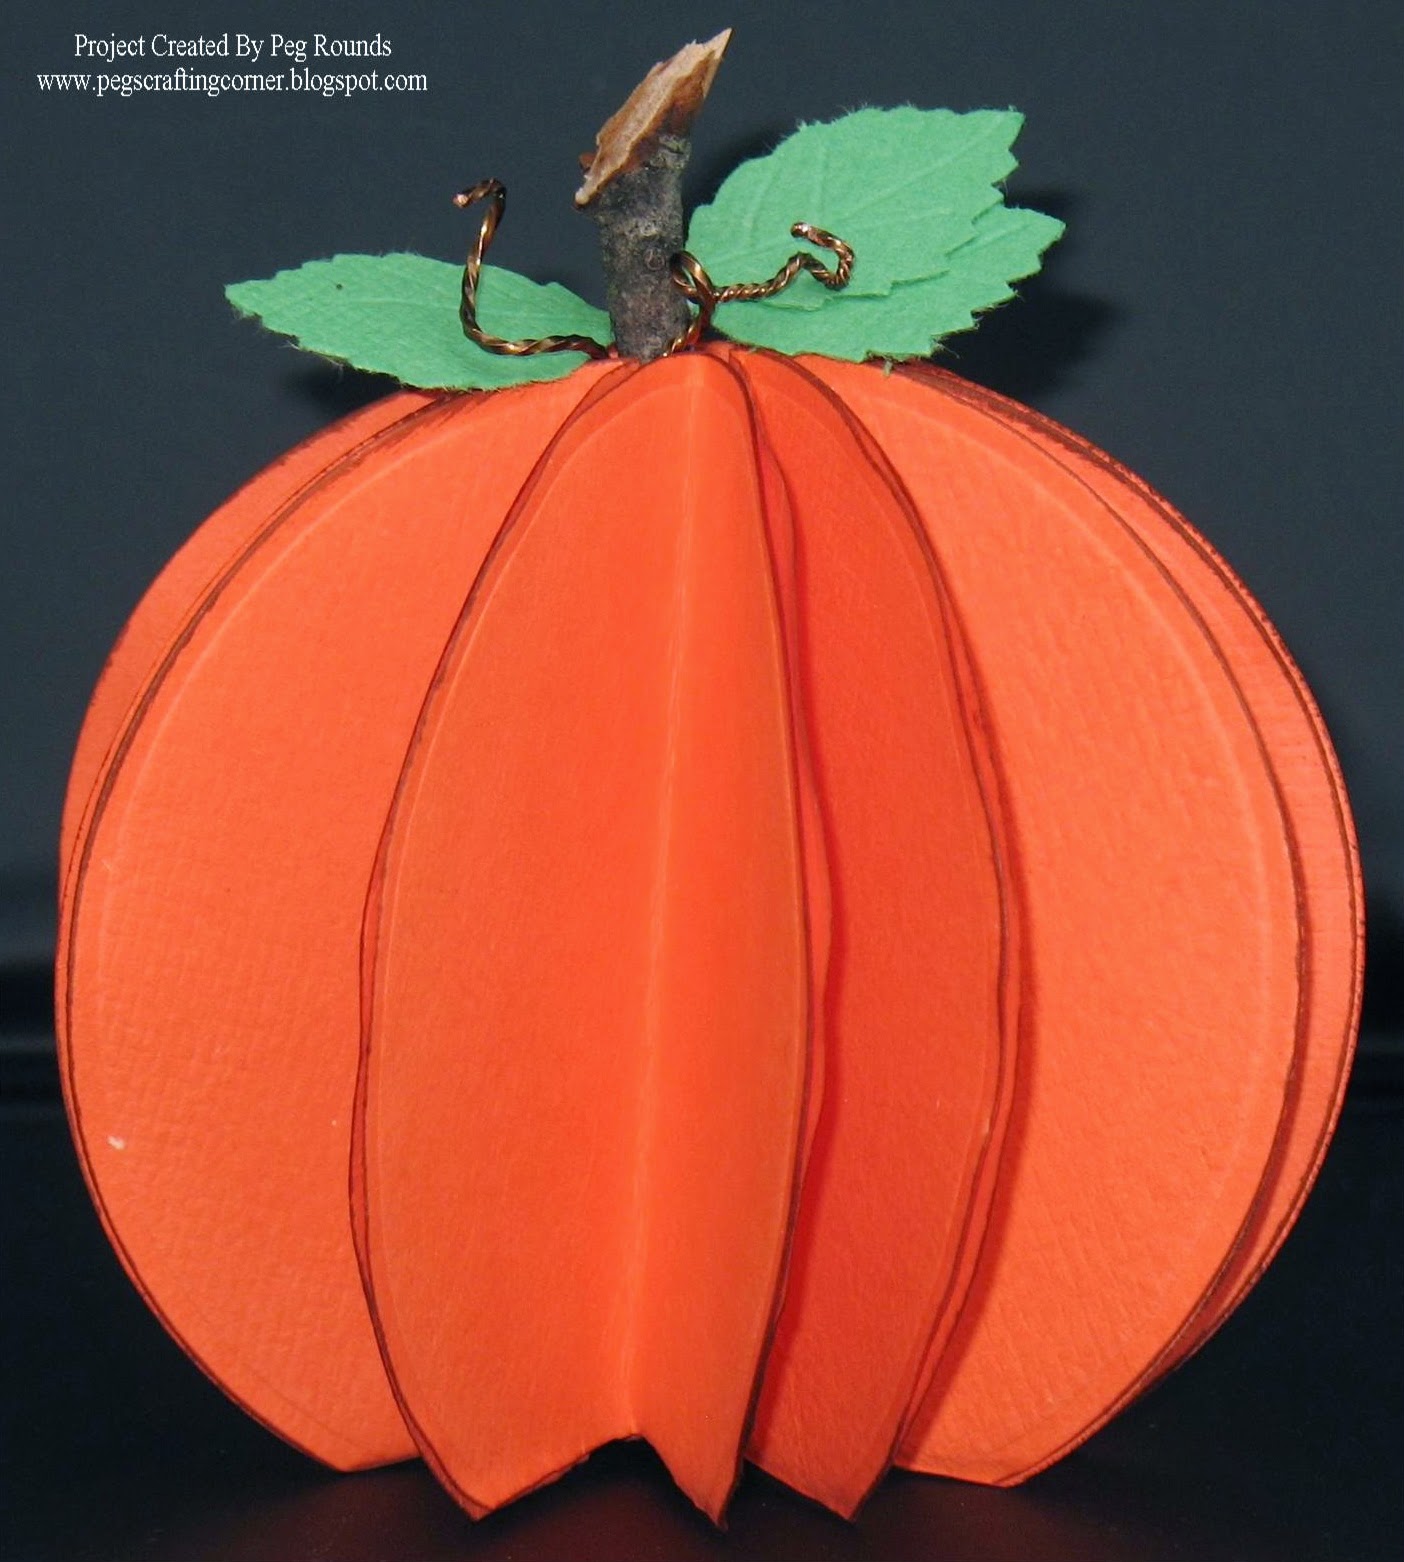
It's hard to believe this year is more than half over and fall is not that far away.  I am happy it is, though, as it is my favorite season with winter a close second.  I'm always excited to start creating and decorating for the fall and one of my favorite things to create are pumpkins.    This year, I took my pumpkin making a step further and turned it into this mixed media project.  What better mixed media is there than handmade paper, wire and things from nature?  These little pumpkins are easy to make and are perfect for decorating.    Start by making several orange sheets of paper and one or two (it's always nice to have extras on hand) green sheets using one of the Papermill Kits and the basic instructions.  You will need enough orange paper to cut 12- 3" or 4" circles.  Once the paper has dried and you've cut the circles ink the edges and fold each one in half and start attaching them together using a tape ru...

Mini Mixed Media Shadowbox by Linda Hess

Image
Hello again!  Have you ever needed a crafting "fix" but had no time??  OR wondered what to do with small scraps of handmade paper leftover from projects.  Well read on, as this will give you an answer to both crafting issues :-)       I found an adorable little shadow box frame at Michaels and had to pick it up (wish I had been able to get more!).  I am sure such a small area (4"x4") was created to showcase a small watch or mini work of art.  It created the perfect challenge for my paper & polymer crafting! Materials: scraps of handmade paper created with the Arnold Grummer's Papermill Pro Mini Textures Casting Mold ( http://arnoldgrummer.com/mini-textures.html ) Premo!Sculpey polymer clays in colors of choice ( www.sculpey.com ) 4"x4" Studio Décor Shadowbox (Michaels Stores) The Ultimate Glue ( www.crafterspick.com ) optional: Pearl Ex powder, mini eyelets, heat set crystals, sticky back pearls Procedure: 1) Remov...

Mini Inspiration Journal

Image
  This is my last project as a member of the Arnold Grummer's Papermaking Design Team. I would like to begin my post by thanking the wonderful people at Arnold Grummer's Papermaking and Terri Sproul for this most awesome opportunity to be a part of the Design Team and work with their products. For this project I made a Mini Inspiration Journal using one of Arnold Grummer's Papermaking Fan Decks. This is one of the coolest ways to make a small book because everything you need to make the book comes in the package. All you need is your own creativity.   Above is a picture of what comes in the package. 2 cover, a screw post (to hold it all together) and 52 ATC sized cards (2.5" x 3.5"). This will come assembled, I took it apart so you could have a better view of all the pieces. This is how I made my Mini Inspiration Journal.   The first thing I did was to Gesso the covers. I did this to prepare the covers for the next layer. Next I added a layer ...