Quick & Easy Mixed Media Canvas by Linda Hess
Materials:
Arnold Grummer's Papermaking kit (I have the Papermill Pro)
shredded paper
blender
LuminArte' Twinkling H2O's (shown: Playful Peony, Coral Berry, and Snap Dragon)
"Love-Peace" mold (Yaley Enterprises)
rubbing alcohol
q-tips
small disposable cups
5"x7" Artist's Loft Canvas Panels (www.michaels.com)
"The Ultimate Glue" (www.crafterspick.com)
Procedure:
1) Into the blender place a handful of shredded paper and ~1/2tsp of LuminArte Twinkling H2O's (I used Snap Dragon for this demo). Cover with water. Blend on high to create a paper pulp.


3) While damp, tear off rectangles a bit larger than each mold crevice. I love to keep the rough edges rather than cut them with scissors. It adds to the freeform look. Press the paper into each side of the mold. Be sure to press firmly into the lettering and along the corners. Turn the filled mold over onto a couch sheet and let dry overnight. Carefully remove "Love" & "Peace" from the mold, then continue to dry before moving onto the next step
NOTE: If the molded pieces curl as they dry, they can be flattened out by placing a lightweight book on top. Be careful not to use one that I too heavy or you may risk cracking the molded piece!
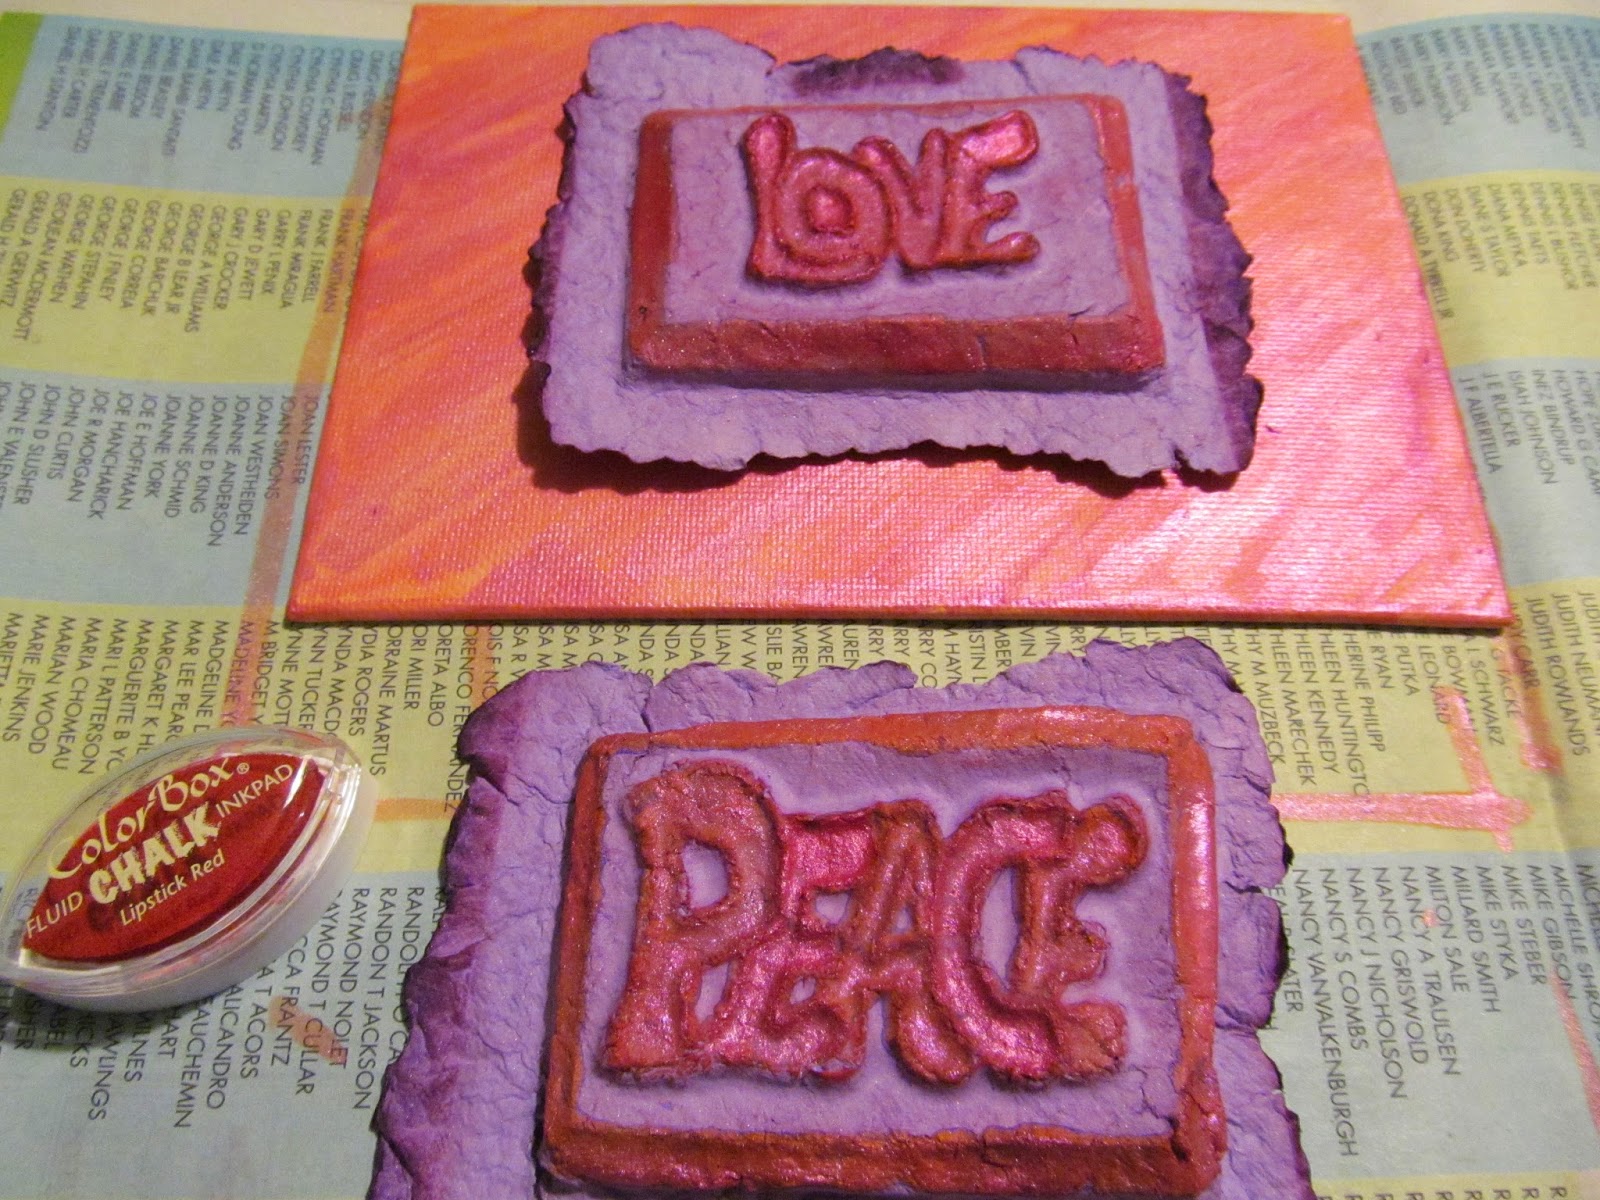
Now you have your handmade paper pieces. Aren't they fabulous?? One thing I love about the Twinkling H2O's is that the shimmer shows even when mixed into the paper pulp...can you see it? But wait until you see what happens when you use it on a canvas...Time to paint!
1) Place about 1/4tsp of Playful Peony & Coral berry into small disposable cups. Add a tsp of rubbing alcohol to each cup. Mix with each with a Q-tip. Isn't the shimmer gorgeous?!


3) While the canvas is drying, use a stamp pad (ColorBox Fluid Chalk in Lipstick Red shown) to highlight the raised areas of design.


4) Highlight the edges and lettering with more of the alcohol/paint mix.
NOTE: Use this carefully! Too much and your paper could get soft again. It could also bleed to areas where you may not want the "paint".


5) Adhere the painted paper components to painted canvas using "The Ultimate" glue. If necessary, use weights along the paper edges to assure a good bond.


6) If desired a ribbon can be added for hanging or glue a couple of magnets on the back to show off your art on the fridge or your office file cabinet. Lightweight enough to place into a bubble envelope and mail to a special friend.
I hope you have enjoyed his quick and easy tutorial. Have fun creating!


POSTSCRIPT
Amping up the project: When I stepped back from this project I noticed that it was a little simple/plain for my normal work. For that reason may I present the "amped up" version. With a little trim from my stash


(((SIGH))) I feel MUCH better now. :-)


pretty, pretty! Love the shimmer on handmade paper!
ReplyDeleteLove how well your casts turned out using a plastic mold. Does Yaley make soap or candle molds? Thanks for the great Valentines project, lots of inspiration here!
ReplyDeleteVery nice colors and love your handmade paper, Great clay embellishments, Too
ReplyDeletethank you. The clay work is my own :-)
Delete