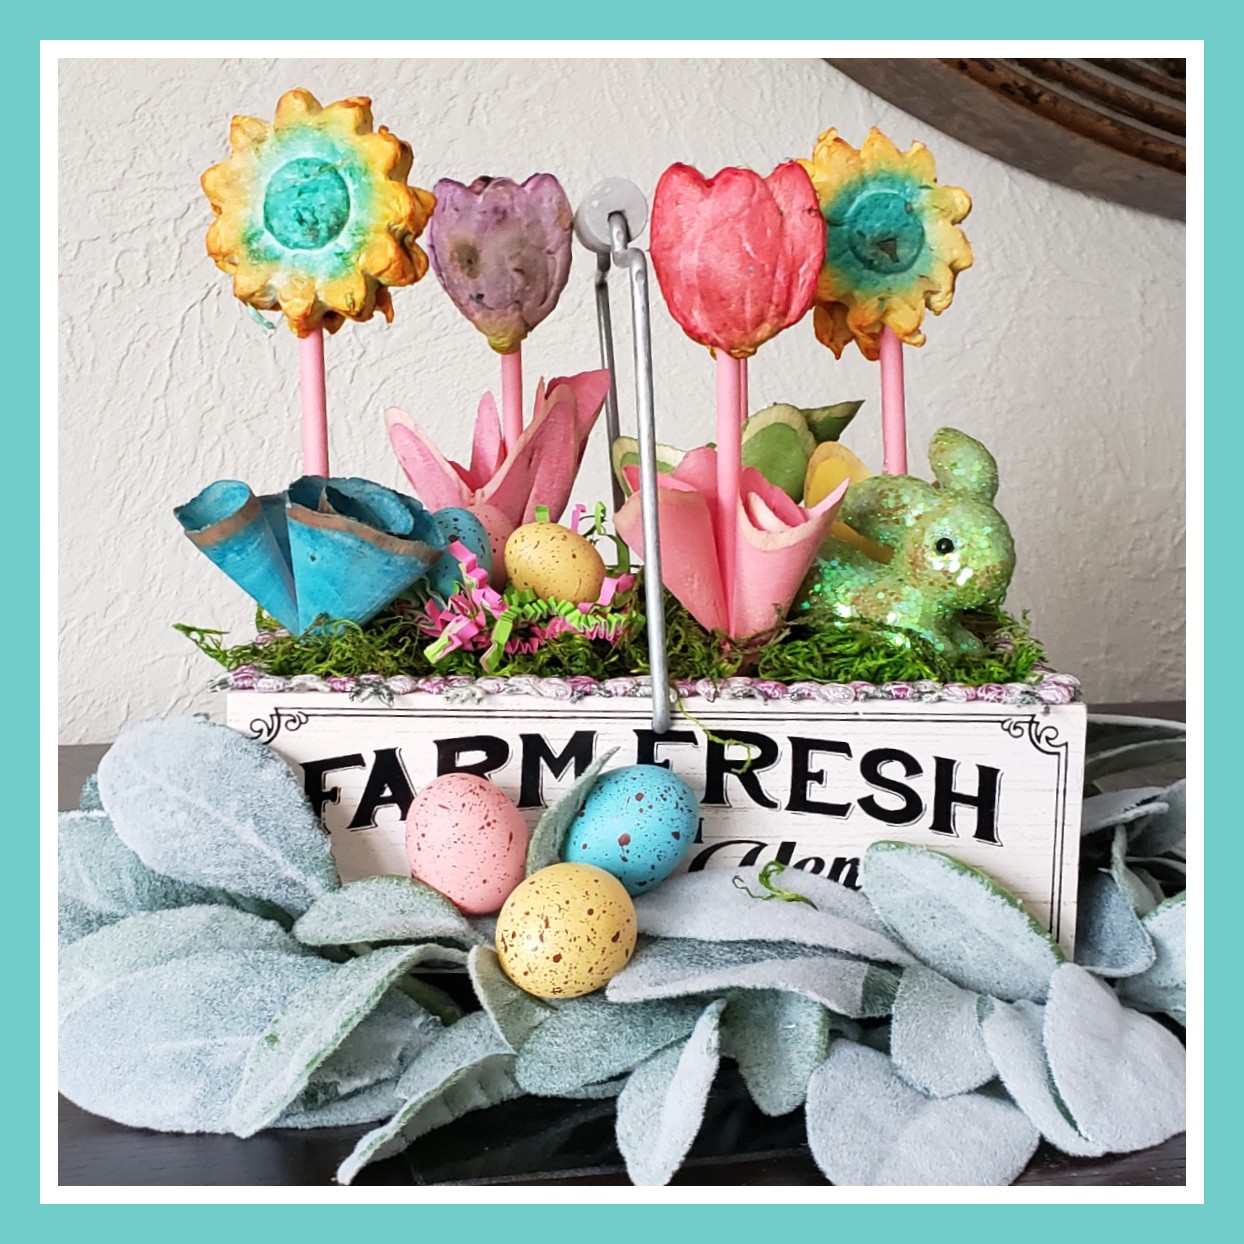
A Tisket, A Tasket. . .An Egg-stra Special Basket

With winter really becoming an
unwelcome guest, we need a little something to look forward to. In my head, I
see colorful pops of flowers, juicy green grass, and a tangerine sun. Indeed,
these are on the way but there is absolutely no reason we can’t egg it on a
little bit now. I have created a sweet little flower planter resplendent with
tulips and sunflowers and some surprising little eggs hidden in the grass
beneath. Curious how to create your own?
What You’ll Need:
Arnold Grummer’s® Best Selling Cotton
Lintner: 8 oz. Pre-Shredded https://arnoldgrummer.com/cotton-linter-pre-shredded-8-oz-package.html
-or-
Arnold Grummer’s® 8 oz. Cotton Lintner
Sheet Pulp https://arnoldgrummer.com/8oz-cotton-linter-sheet-pulp.html
Arnold Grummer’s® 4 oz. 100% White
Cotton Rag Pulp
Arnold Grummer’s® Petals: Summer Gold https://arnoldgrummer.com/petals-summer-gold.html
Flower Mold
Candy/Cookie Sticks in your favorite color
or design
Food Color (Regular and Neon)
Air dry clay
Paper Easter grass
Small Easter eggs
Container with dividers
Paintbrush
Moss
Rose Shavings
Rabbit and eggs for decoration
Aleene’s Tacky Glue
Floral Ribbon

What You’ll Do:
- Make pulp using white paper remnants (envelopes are great for this), Cotton Lintner Pulp, Cotton Rag Pulp, and some Petals: Summer Gold.
- Using the pulp, make flower castings from the flower mold. Be sure to use a flexible mold so that removal of the flowers will be much easier.
- After pressing all of the excess water out of the flowers, mix two or three drops of food coloring and about two teaspoons of water. Dip a paintbrush into the mixture and touch the flower. Because it is still wet, the flower pulp will draw the color across itself. Keep adding until the flower is covered.
- You can allow the flowers to air dry or you can begin the drying process by placing the flowers in a 200 degree oven. I covered mine with tinfoil. This helped keep scorching down. However, the scorching does add some wonderful character.
- While the flowers are drying, set some air dry clay down in the sections where you plan to house the flowers. Anchor a stick in the clay and allow to dry.
- When the air dry clay is fairly firm and the sticks feel solid, glue the flower heads to the top of the sticks.
- Glue the floral ribbon around the edge of the container.
- To fill the sections of the container, I went with recycling and used some of the paper that had been used to wrap glass that I had purchased at my local craft store. It packs down tightly. However, you could also use air dry clay.
- Add moss on top of the filler layer.
- Wrap the rose shavings around the base of the flowers to mimic leaves.
- Add the bunny and the eggs. You might also want to place the container on top of a wreath of soft green leaves.
I’d love to see what you end up
creating so be sure to share it with me!
Anne Marie
Want to know more about me? Find me
online at:
Website:
https://www.mysticspringstudios.com


What a lovely way to wait for spring!
ReplyDeleteSuper cute!
ReplyDelete