Costume Accessories
*UPDATED: COMPLETE SUPER HERO COSTUME PICTURE BELOW
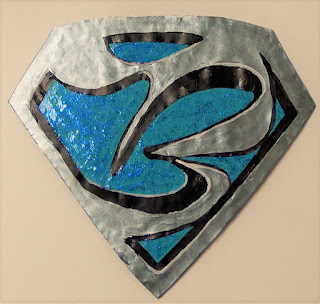
I'm finalizing the details for my Halloween costume! I love working with paper and paper pulp. It's so easy to work with to create your vision and the finished accessories are light-weight. Nobody wants to be weighed down by their costume :o) Yes, I "mixed metals". I just felt like the Ohm needed to be warmer toned and the mask I made previously will tie it all together.
Supply List:
Acrylic Paint - Black, white, turquoise, blue patina (metallic)
Glitter Glue - blue
Embossing Pigment and gold embossing powder
Instructions:
1. Make one big sheet of hand made paper per the kit instructions.
2. Cut out the shape for the chest plate and a 3" circle for the belt buckle.Paint them with acrylic paint and let dry.
3. Cut out a fancy font letter for the chest plate, paint with acrylic paints.
4. Cut out the Ohm symbol. Apply embossing pigment and powder. Heat the embossing powder until it's shiny. I did three coats of powder.
5. Glue the fancy font to the chest plate. Paint the negative areas with glitter glue. Hind sight tells me it would have been easier to just paint the entire painted chest plate with glitter glue before layering.
6. Assemble the Ohm pieces onto the 3" circle. Accent letters with thin black marker to make it look more 3-d. Paint the background with glitter glue. Use embossing pigment and gold embossing powder around the edges. This will be attached to a plain black belt.
The chest plate isn't really as bumpy as it looks, it was very damp, humid and the paint just wouldn't dry and I needed to take the photos.
HERE'S THE ENTIRE COSTUME! a wet suit and some tall black boots, add a cape and the hand made paper accessories viola! See this previous post for the mask instructions.

FOLLOW ME ON INSTAGRAM FOLLOW ME ON PINTEREST


How fun! Can't wait to see it all together!
ReplyDeleteHow FUN! Never would have thought to use handmade paper this way....love it!
ReplyDelete