Christmas Candle Casting Card
Hello, everyone!
It's Nancy here with a festive new project share!
I have done my first paper casting!
Was it ever FUN,
and I'm afraid it's just as addicting as paper making! ;o)
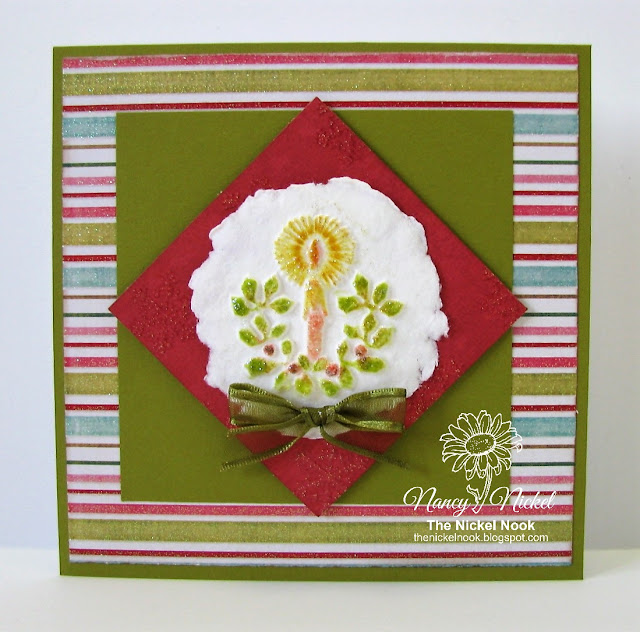
Here's my card for today:
My friend Michele was so helpful in getting me started.
She sent me some fun molds.
I was also generously provided with some great Paper Casting Stamps from Rycraft!
Look at the stash of casting pieces I made:


I hope you enjoyed seeing my first paper casting card!
As you can see from the stash I made,
I'll be sharing more finished projects soon! :o)
Was it ever FUN,
and I'm afraid it's just as addicting as paper making! ;o)
Here's my card for today:

She sent me some fun molds.
I was also generously provided with some great Paper Casting Stamps from Rycraft!
Look at the stash of casting pieces I made:

Materials Used in My Project:
Arnold Grummer - White Cotton Linter;
Blender;
Rycraft Paper Casting Stamp - Christmas Candle;
Imagine Crafts Ink: Memento - Dandelion, Pear Tart, Red, and Fantastix;
Papers: Recollections - Cardstock, My Mind's Eye - Wonderful Winter;
Ribbon: Celebrate It;
Stickles: Star Dust.

1. I began by doing all the fun casting. The one 8 oz bag of Cotton Linter was enough to make all of these pieces. I simply added a handful of Linter to the blender with some water, and blended. After pouring it through a strainer, I added the wet pulp into the casting stamps. Then it was just a matter of using a sponge and towel to remove all the water. I popped the shapes out of the stamps, and allowed them to air dry. You can find complete casting instructions at the Arnold Grummer Resource Page.

2. For my first casting card, I opted to use the casting of the Christmas Candle. I swiped some ink onto a plastic sheet, and used the Fantastix to color the design.

3. Here's a close-up look of the coloring.

4. I used a 5 1/2" square card base. I covered it with a 5 1/2" square of green cardstock. I then layered on a pretty striped piece of designer paper that was 5 1/4" square. Next, I centered a 4" square of paper to the striped background.
5. Using double sided tape, I adhered the casting piece to the center of a 3" square of red designer paper. I decided that turning the red paper on the diagonal added some fun interest. I then adhered the red piece onto the green square using foam tape.

6. In this photo you can see that both of the designer papers I used have a beautiful glossy/sparkle finish on them. This inspired me to add some pretty Stickles to the candle design. I just dabbed a little on with my finger.

7. Finally, I added a little green ribbon bow that just happened to be lying on my work table.

In the photo above you can see the glittered design.
Here's one last look at my card, in the photo below.

I hope you enjoyed seeing my first paper casting card!
As you can see from the stash I made,
I'll be sharing more finished projects soon! :o)
* * * * *


BEAUTIFUL! I new you would love paper casting as much as I do! And aren't the paper casting/cookie stamps from Rycraft just wonderful!!
ReplyDeleteThanks so much, Michele! Yes, they're great stamps, and now I'm totally hooked on paper casting! :o)
Delete