Posts

Showing posts from December, 2019

Rose Casting Card

Image
Hello, everyone! It's Nancy back today, with one final 2019 project to share!    I just had to make another card using my stash of paper casting pieces! Here's my card for today: Although I'm using a casting stamp provided to me by  Rycraft , Arnold Grummer has some really beautiful designs.  You can find all their Casting Molds HERE . * * * * *  Materials Used in My Project: Arnold Grummer -  White Cotton Linter ; Arnold Grummer -  Iridescent Flakes ; Blender; Rycraft Paper Casting Stamp -  Rose ; Chalk: Unknown - Pink and Green; Papers: DCWV Shimmer Cardstock - Pink; Doily: From My Stash; Ribbon: Celebrate It; Marker: Spectrum Noir - Clear Sparkle. * * * * * Just as a reminder...here's how I did my casting:  The one 8 oz bag of Cotton Linter was enough to make all of these pieces. I simply added a handful of Linter to the blender with some water, and blended. I wanted my Rose casting to have some sparkle in it

Quick & Easy Christmas Cards

Image
My Christmas card list keeps getting longer & time is getting shorter….sigh. Follow along while I create two cards that look like they took hours to make but actually took less than 15 minutes each to create! Supplies: • Any of the Arnold Grummer® paper making kits and paper press • Blender, cello sponges and soft towels • A sunny window • Scraps of white paper (think junk mail, etc.) • Scrap of white & Kraft card stock to die cut • 6 x 6’” cards and envelopes • Dies: “Deer” MemoryBox  #98679,  Couture Creations “Peace On Earth” # CO726297,         “Kindness” #FRA-Die-10500.....Fran the Frantic Stamper,  Mary & Joseph” Nellie’s # SD139        (CC, Nellies & FTFS dies available from Ecstasy Crafts) • Tonic Studios™ Tangerine die cutting and embossing machine • Tonic Studios™ paper trimmer • Tonic Studios Nuvo Pur Sheen Glitter #721 Ice White • Tonic Studios Nuvo Glitter Drops #758 White Blizzard • Tonic Studios Craft Tacky adhesive •

It's Beginning to Look a Lot like Christmas

Image
WOW! Where has this year gone? Seems like just a few days ago that it was the beginning of a new year. The days are just whizzing by and 2020 will be here before I know it. I’m a bit late this year finishing up some of the 300 + Christmas cards that I create and send. Adding the Veterans and spouses from the “Healing with ART” classes to the list of card recipients is a privilege and a blessing. I want them to know how much joy they have brought into my life. These cards go together so quickly after the paper is made….you can easily create them by the batch! Remember that I always make extra sheets of handmade paper and/or castings to have on hand for future use. Supplies: • Any of the Arnold Grummer® paper making kits and paper press • Blender, cello sponges and soft towels • A sunny window • Scraps of white paper (think junk mail, etc.)  • 5 x 7 cards and envelopes • Embossing folders:: Crafters Companion™: GEM-EF5-3DPE (Peace on Earth),     

Christmas Candle Casting Card

Image
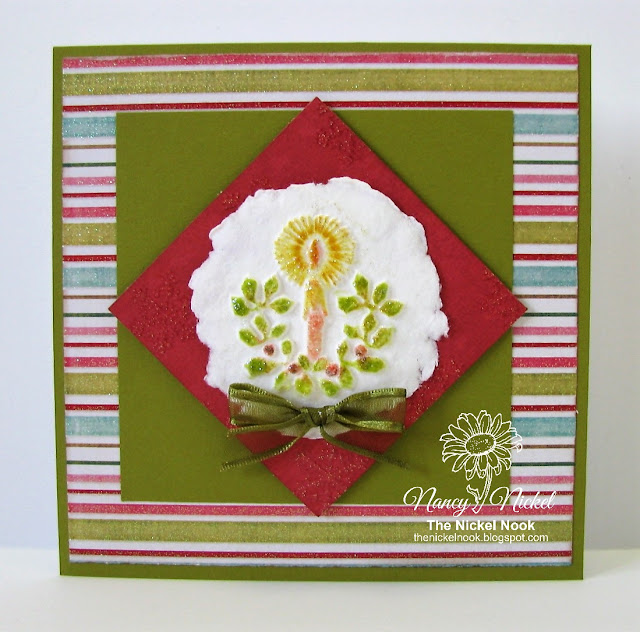
Hello, everyone! It's Nancy here with a festive new project share! I have done my first paper casting! Was it ever FUN, and I'm afraid it's just as addicting as paper making!  ;o) Here's my card for today: My friend Michele was so helpful in getting me started. She sent me some fun molds. I was also generously provided with some great Paper Casting Stamps from   Rycraft ! Look at the stash of casting pieces I made: Materials Used in My Project: Arnold Grummer -  White Cotton Linter ; Blender; Rycraft Paper Casting Stamp -  Christmas Candle ; Imagine Crafts Ink: Memento - Dandelion, Pear Tart, Red, and Fantastix; Papers: Recollections - Cardstock, My Mind's Eye - Wonderful Winter; Ribbon: Celebrate It; Stickles: Star Dust. 1. I began by doing all the fun casting. The one 8 oz bag of Cotton Linter was enough to make all of these pieces. I simply added a handful of Linter to the blender with some water, and blended.

Tea for Two...or Three

Image
Is there anything more peaceful than having a cup of tea and a long visit with a friend? Taking time from our busy days and just “being” instead of “doing” is a rare treat. I have dedicated some time before the rush of Christmas and the New Year to just sit and share the moments with a few friends and let them know how much they mean to me. Serve special teas and homemade cookies! Supplies: • Any of the Arnold Grumme r® paper making kits & paper press • Blender, strainer, cello sponges and soft towels • A sunny window • Scraps of off white & tan paper (think junk mail, etc.) • Dark brown card stock for cards • Envelopes to fit cards • Rycraft ®  # 353 “Cup of Tea”, #318 “Tea Time” & # 495 Tea Leaves cookie or paper         casting stamps • Stamps: Marianne Designs™ #KJ1710 “Tea is like…..” & #KJ1707 “There is…..”          Unknown: “A cup of tea…” • Tonic Studios™ paper trimmer • Scor-Pal™ • Beacon ZipDryTM adhesive • Double sided foa

Falling In Love With Fall

Image
Fall really is my favorite time of year…perhaps being born in early November has something to do with it…smile. I breathe in the cool air and marvel at the changing colors of the leaves. Knowing that it is the beginning of a time of rest for the plants, animals, people and the planet  is soothing. Supplies: • Any of the Arnold Grummer® paper making kits & paper press • Blender, cello sponges and soft towels • A sunny window • Scraps of off white/tan paper (think junk mail, etc.) • Kraft and brown card stock for card bases & layers. • Envelopes to fit cards • Embossing folders: Darice™ “Fall”, Creative Expressions™ #CEST027  “Woven” • Stamp: Quiet Fire Designs™ #5930 “I am the connection….” • Tonic Studios™ Tangerine die cutting and embossing machine • Tonic Studios™ paper trimmer • Hinged stamp positioner • Scor-Pal™ • Beacon ZipDryTM adhesive • Thin linen cord • ColorBox™ Dyestress Blendable ink pads: Fall colors                      

Christmas Shaker Cards

Image
Hi everyone, Steph Ackerman here with a new set of Christmas Shaker cards using Arnold Grummer Papermaking kits. I've used left over papers from other projects.  For each card, I used the remaining die cut panels and frayed the edges. I adhered a plastic sheet to each panel, and  Using my MISTI, I stamped phrases in the lower corner with StazOn ink.  Using the MISTI ensured that if I had to restamp the phrase that it would line up correctly. I placed foam tape around the panels and placed dew drops in the cavities before adhering the backing. Finally I added flowers and leaves to the corners. Thanks for stopping by. Steph