Pretty Paper Posies
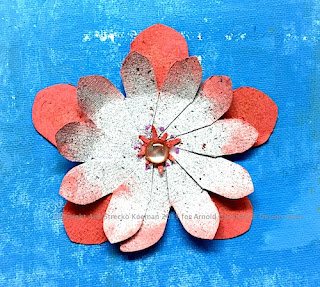
Hello, Ann here today from the AG Blog Design Team and the blog: Annmakes.blogspot.com. I have more flower power love to share with you today! Here is my latest project:
To make this I used two sheets and a scrap (I keep the little bits left over) of some handmade paper I made. Of course these were made following the Original Arnold Grummer Pour Mould method (link to video). I like to use my handmade papers just like any store bought paper, and I dare to treat it the same way in the art making process. For this project I wanted to play with some new tools I got.
1. I cut strips of paper according to the measurements as suggested by the makers of the "Flower Punch Board" and then I proceeded to punch and score according to that manufacturer's instructions. It was easy and quick to do.
2, Once I had the strips prepared I then folded, accordion style, the flowers. I used some double sided adhesive to keep the petals down. I stacked aa extra small flower on top of a larger flower and glued.
3. To make the centre of the flower I used a Paper Punch and made the flower burst shape. I glued that to the centre too. (See first picture)
4. I added a vintage button from my collection and some sparkling glitter glue.
5. To add some dimension to this "Posie" I inked the edges with some chalk ink. Now my flower is done and is ready to be used in another project or even as a gift topper instead of a bow!
I hope that you are inspired to make some handmade papers and go play with your scrapbooking tools in new ways.
Supplies:
Handmade paper (mine)
Chalk Ink in "coral"
Aleene's Tacky Glue
Double sided tape 3m
Button (my stash)
We R Memory Keepers "Flower Punch Board"
Fiskars hand punch "Burst"
Glitter Glue in pink (Dollarama)
Thank you for stopping by, and please go over to my blog where I share lots and lots of how to's!


Such a fun flower!!!
ReplyDeleteLove new tools, can never have enough!
ReplyDeleteVery, very pretty!
ReplyDelete