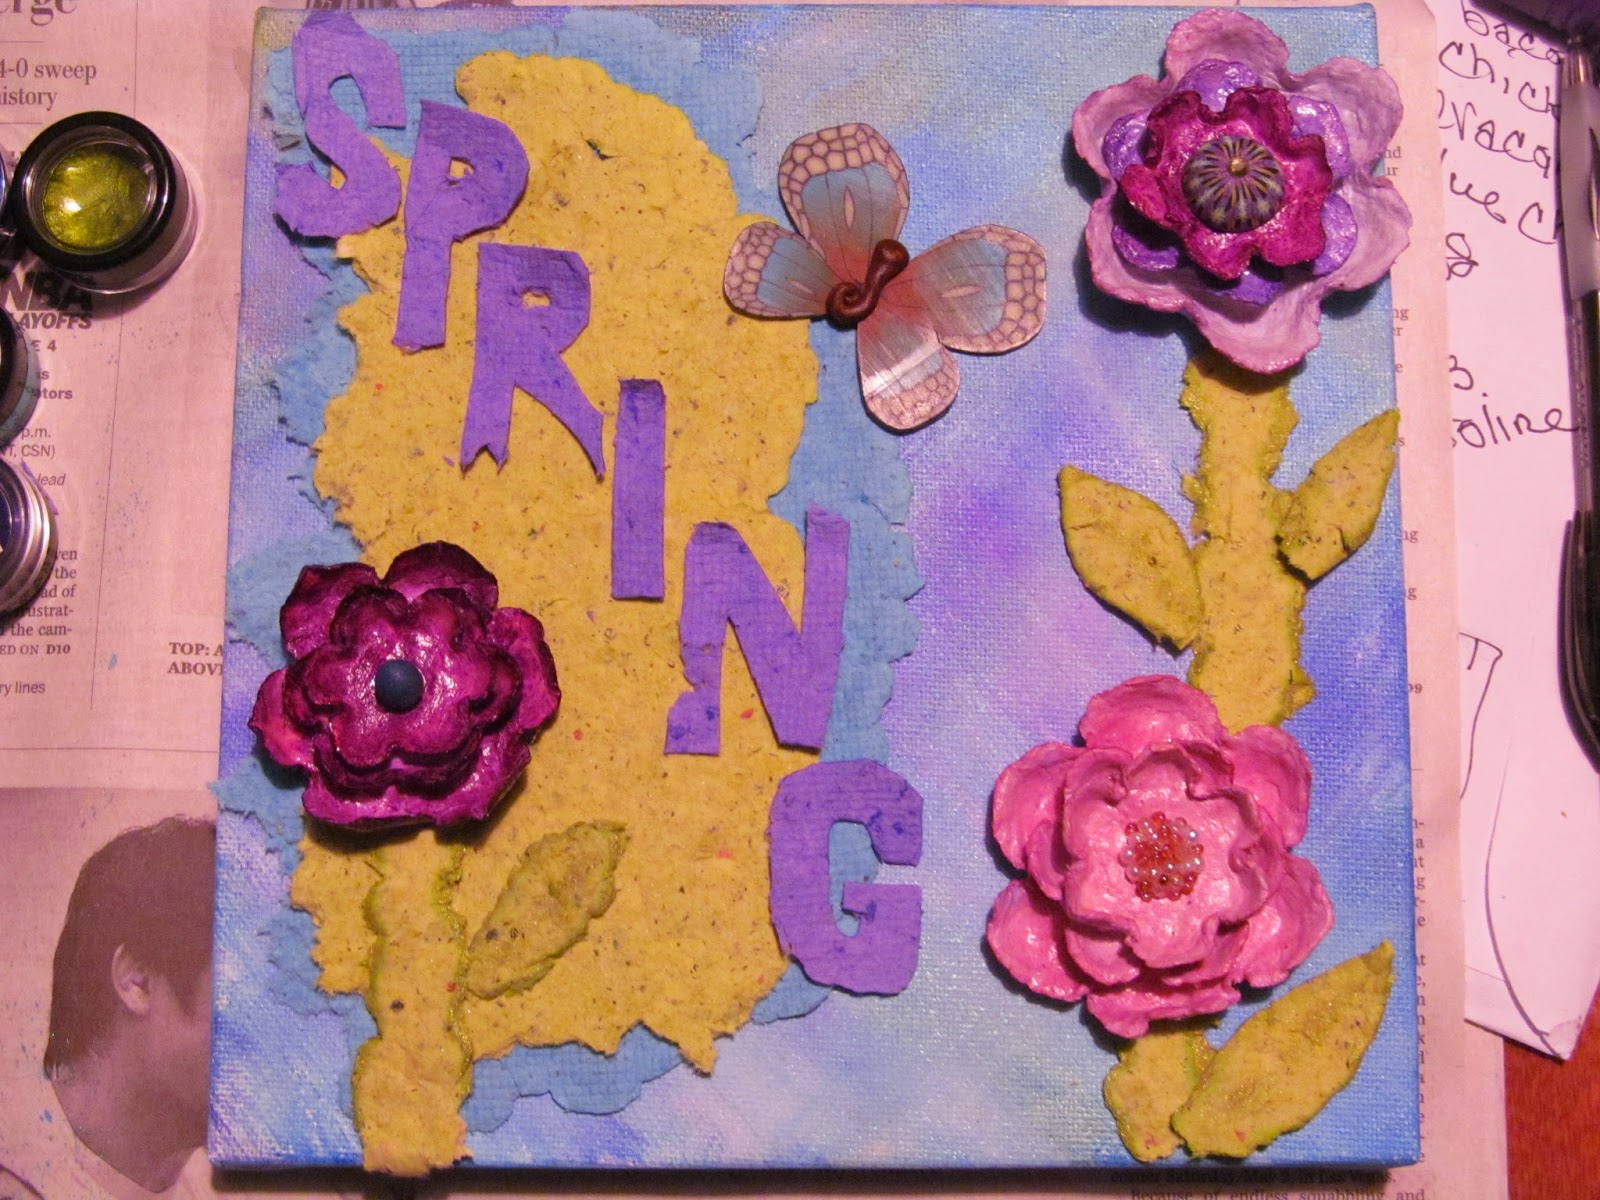
"Spring Has Sprung" mixed media canvas by Linda Hess
I love working with stretched canvas. A recent sale at Michaels brought me to purchase quite a few for my classroom and my studio. This morning I woke to a vision of a spring canvas, layered with handmade papers, paint, a bit of stitching, some polymer clay, and a few paper flowers that I created for an upcoming article in "Just Jewelry" magazine. I hope you enjoy this tutorial.
Materials:
Arnold Grummer's Papermill Pro
LuminArte' Twinkling H2Os
blender
8"x8" stretched canvas (or whatever size you have handy)
brush
The Ultimate! glue
Procedure:
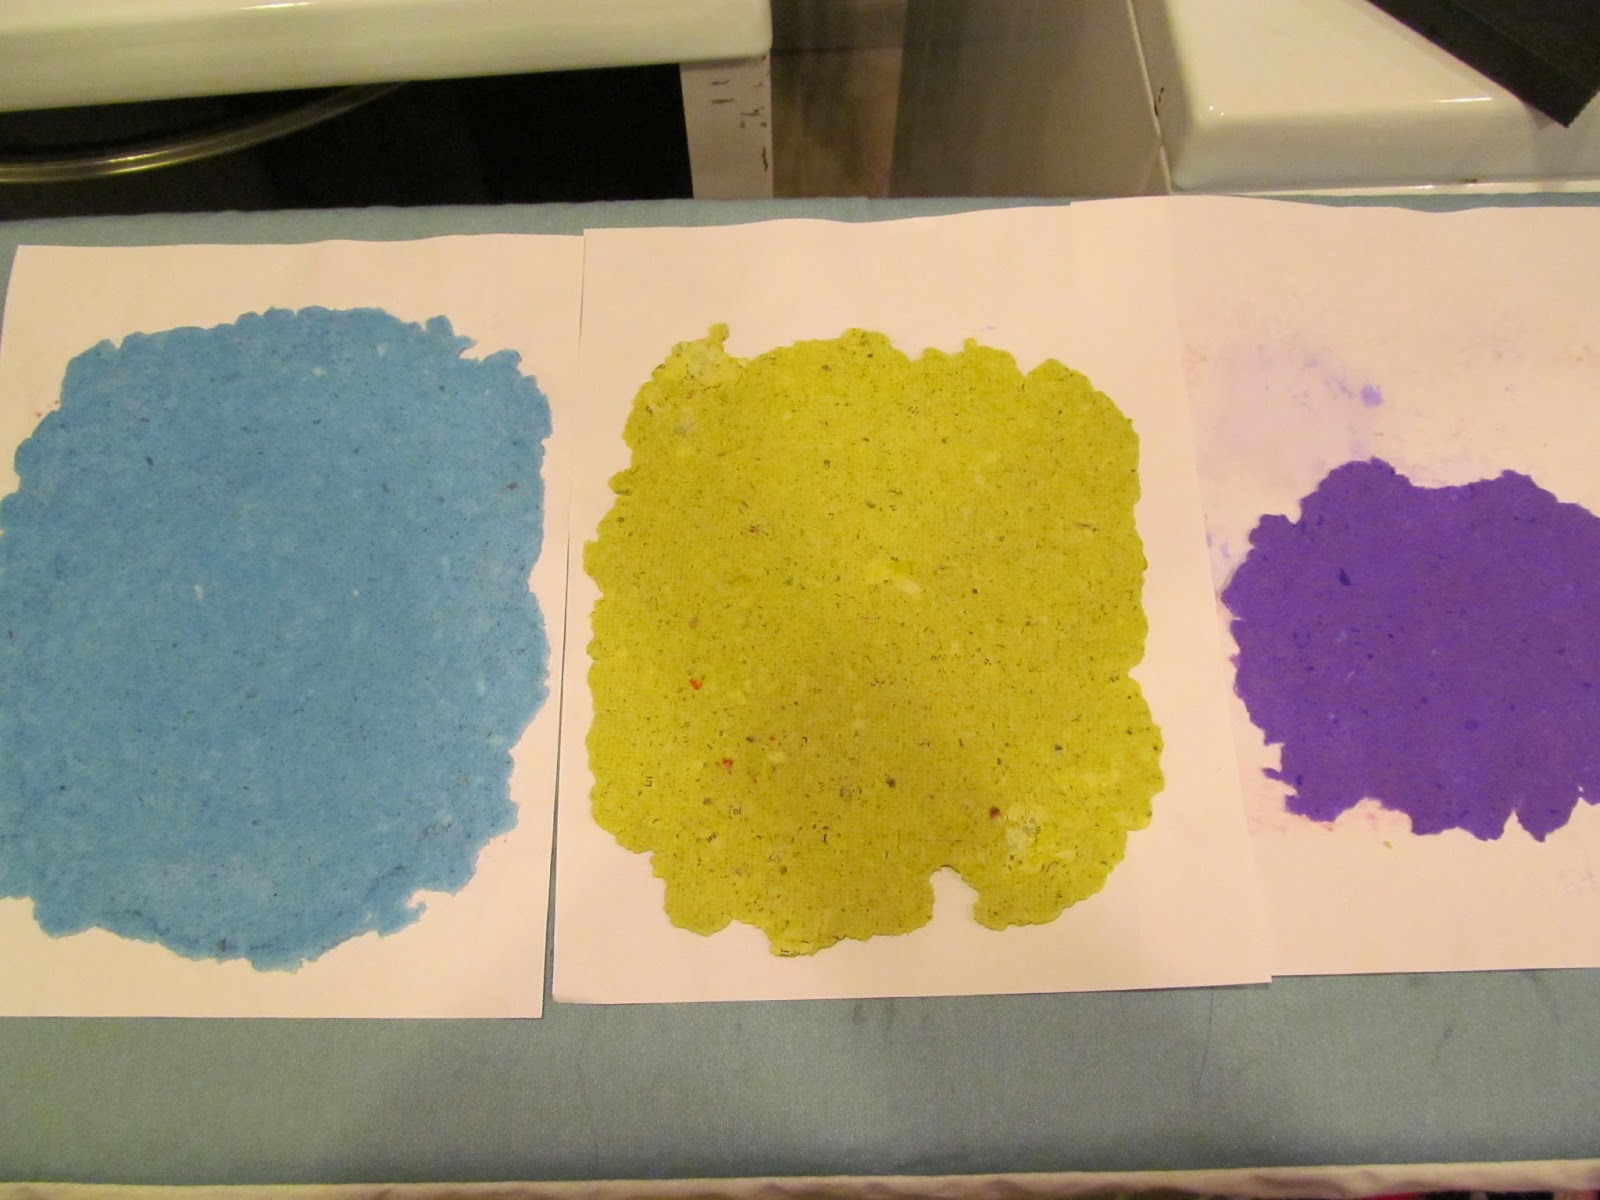
1) Following the instructions with Papermill Pro create 3 batches of paper pulp. Sprinkle a bit of the powdered Twinkling H2Os paint into each batch (one color obviously per batch). Once blended, pour pulp onto paper making screen placed on top of the plastic grid. Spread the pulp into an even layer using your fingers. Follow instructions for pressing out moisture and creating a sheet of paper from each batch.
2) Paint canvas. Now those who know me know that I am not a painter, so sponge painting is my speed. This time I decided to "branch out" of my comfort zone and paint cross hatch style. I layered 4 different Twinkling H2O colors (Sapphire on Ice, Pretty Peony, African Jade, & Boysenberry). Once the canvas is completely covered (don't forget the sides), set it aside to dry.
3) Now time to decorate. I have an article coming out in "Just Jewelry" magazine for handmade paper flower pins. I had a few flowers sitting in my studio and thought what a perfect dimensional effect for the canvas they would be!
I cut stems and leaves from the key lime sheet and placed them on the canvas adding a flower to each. (NOTE: I never attach anything until I am sure of the placement)
4) I like rough, uncut edges on canvas designs. To obtain this effect with a bit of direction I wet the sheet of paper and then tear along the wet edge. One color is a bit simple for my eye, so I will layer 2 colors along one side of the canvas. Letters are cut from the purple sheet.
5) For the leaves to pop out I painted the edges with Pretty Peony. I love the shimmer that these paints add.
Once you are happy with the look, glue everything down using my favorite glue, The Ultimate by Crafters Pick


These colours are so vibrant and happy. Lovely way to use the handmade paper. Great job.
ReplyDeleteLove the idea of adding H20s ! Awesome colors!
ReplyDeletePretty and pretty clever!
ReplyDeleteGreetings,
ReplyDeleteWhat a terrific "SPRING" project!
Love and light,
Michele