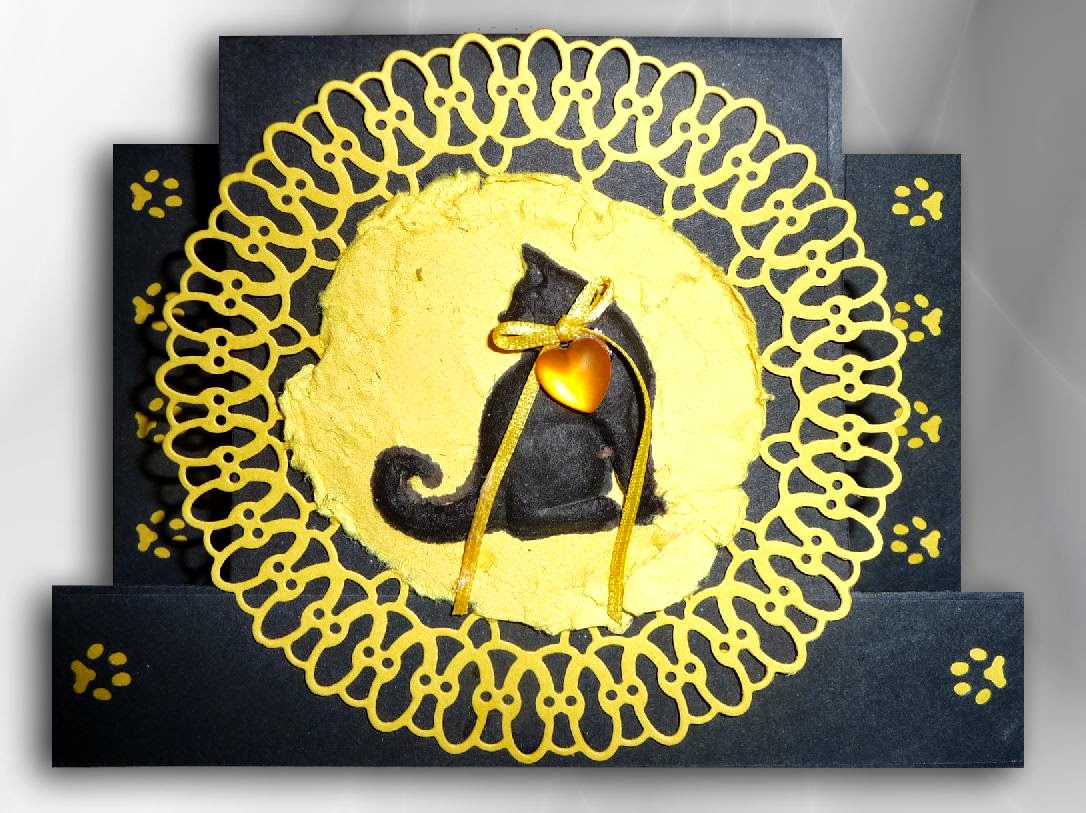
Here Kitty Kitty
©Michele
Emerson-Roberts 2014
I love October! Fall colors, cooler weather and one of my favorite holidays, Halloween. I’m not into witches and goblins but black cats are great. We have a wonderful black kitty named “Bitty”, who we rescued from under our porch 13 years ago. She is precious and rules the roost, keeping the two dogs in line at all times. My card today honors Bitty and all the kitties in our lives.
I love October! Fall colors, cooler weather and one of my favorite holidays, Halloween. I’m not into witches and goblins but black cats are great. We have a wonderful black kitty named “Bitty”, who we rescued from under our porch 13 years ago. She is precious and rules the roost, keeping the two dogs in line at all times. My card today honors Bitty and all the kitties in our lives.
Supplies:
- Any of the Arnold Grummer™ paper making
kits
- Molds: R320 Cat With Heart (available from AG)
- Microwave, heat gun or a sunny
window
- Blender, small strainer, cello
sponges and soft towels, paper cutter, scissors, bone folder
- Beacon Quick Grab™ and ZipDry™ Adhesives,
double sided foam tape or dots
- Scraps of yellow paper (think
colored junk mail, etc.)
- 1 sheets of black 8 ½ x 5 1/2”
cardstock
- Envelope for a 4 ¼ x 5 ½” card
(or use the AG template to create a matching envelope)
- Dies: Stamp Doctor Center Step Card,
Cheery Lynn Chasing Rainbows Doily
- Spellbinders Grand
Calibur™ Machine
- Punches: small cat foot print
- Bow EasyTM
- 12” yellow 1/8” satin ribbon
- Small flat backed yellow heart
cabochon
- Fine tip black Sharpie™ marker,
yellow gel pen
Instructions:
- Follow the direction for paper
making and casting found in any of the Arnold Grummer paper making kits or
books to make slurry from the yellow scraps.
- Cast one (or more) of the cat
molds.
- Dry the castings in the
microwave, with the heat tool, or place in a sunny window.
- Create a sheet of yellow handmade
paper. Allow the paper to dry.
- Cut one yellow doily.
- Cut two strips of yellow scrap to
go behind the punched foot prints. (Save the scrap for another project.
- Cut one of the center step cards
from the sheet of black card stock.
- Fold the card and use the bone
folder to get a good crease.
- Punch kitty foot prints along the
outside edges and the two bottom corners of the center step card.
Assemble the card:
- Carefully color the kitty with
the black Sharpie™ marker.
- Tie a tiny bow with the yellow
ribbon.
- Attach the bow and the heart
cabochon at the neck of the kitty.
- Use the ZipDry™ adhesive to
attach the yellow strips behind the kitty foot prints and to attach the
doily to the center of the card.
- Use double sided foam tape or
dots to attach the kitty casting to the center of the doily.
- Write a Happy Halloween message
inside the card with the yellow gel pen.


Tell you what, Michele, your design is perfect for Halloween but just imagine in other colors for an Animal Shelter event or fund raiser. This is a terrific design! If we knew someone who works at a shelter we could find out if making these for them could be a gift shop item, or thank you card for large donations ;-)
ReplyDelete