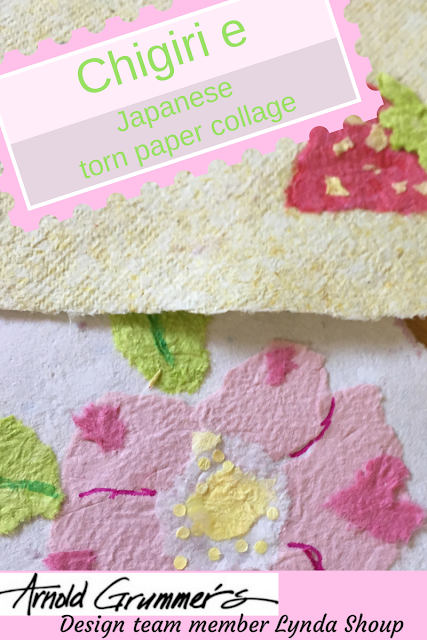
Chigiri-e Japanese torn paper collage
This tutorial will show you how to create a chigiri-e inspired torn paper collage using handmade paper. Chigiri-e is a traditional Japanese craft. It is used for stationary, wall hangings, boxes and all kinds of decoration.
Handmade paper is perfect for this technique as the torn edges provide a lot of texture. This is a great time to use the scraps of paper left over from other projects as well as those pieces of paper that have irregularities.
Materials:
Medium Couch Sheets (You are going to need a lot of these if you want to make the variety of colors you will want for making the variety of colors of paper to choose from that I want.)
-Paper for background
-Various handmade papers for the design
-Embossing stylus (optional) or pencil
-Tracing paper (I used Dritz Disappearing Mark-B-Gone Tracing Paper. It took a few days, but the marks are entirely gone.)
-Glue
-Tweezers
Directions:
Place the background on a work surface. Layer the tracing paper and template on top. Using a pencil, trace the design to transfer the image to the background.
Choose paper to make one of the shapes. Place template over the handmade paper and trace. Apply enough pressure to indent the handmade paper.
Using embossing tool, trace over the indentation in your handmade paper. Then gently tear the shape from the paper. Aim for a distinctive shape with some frayed edges.

Using tweezers, dip the piece in glue and carefully apply the piece to the corresponding area of the pattern on the background. Do this for each piece choosing paper to enhance the design. Press firmly to ensure seal.
Rip paper to make the small details, in this case the seeds for the strawberry. Adhere in the same way.
For the flower, transfer design to paper using the tracing paper. It doesn't matter to me if the lines transfer perfectly as this is just a guide to place the pieces. The kind of tracing paper I used is damp, and as you can see the edges left a mark on the paper. Fortunately, it is also disappearing ink, so these marks completely disappeared.
For the flower, the petals were all torn before pasting them down. This ensured that they fit as hoped.
Later the rest of the details were added. The petals appeared as one unit, so I took the liberty of using a marker to add the separation. Trying to use small ripped paper resulted in a muddy vision, so I chose a break from tradition instead.
Save the pieces that are leftover for other chigiri-e projects.
Enjoy learning about Japanese paper arts? Visit my blog (lyndashoup.com/blog) for my series on Japanese Paper Arts Explained and other multimedia projects.


Outstanding tutorial! Beautiful!
ReplyDeleteThank you, Sandee! It was fun to do this project.
DeleteLynda, tis is an amazing and accessible introduction to an art form I've known little about. I think you've added to something that's really missing - or hit and miss - in handmade paper crafting. Folks who sew do 'applique', and mixed media does a lot of collage, so perhaps chigiri-e let's us see what can be done with paper folks make themselves. Using handmade paper pieces to create an artwork - I believe - is still relatively unexplored. With the colors, shading, textures and embedments a person can achieve with handmade their own paper, it seems there's a lot to discover yet. Thanks for this contribution and clear step-by-step instructions!
ReplyDeleteThank you so much, Kim. I have loved Chigiri-e for many years. I especially became enamored of it when the grandmother of a student of mine gave me a set of images she had made this way. Traditionally chigiri-e is done with washi paper, but handmade paper of any kind can be used to great advantage. I agreed that making your own paper you can really control a lot about the final piece. To think that you can make such pieces completely from paper that would have been thrown away really makes me happy.
Deletenice work
ReplyDelete