Origami Coin Purses with Stenciling
Origami coin purses are fun to make and with stenciling, they really shine. You can carry coins or use them as a package for small gifts.

When I was a child a friend of the family brought back matching purses like these for my sister and I. We loved opening and closing them, saving our pennies for candy and displaying them as cherished items.
For the papermaker, they are a quick and easy way to showcase your beautiful paper. With or without the stenciling, your handmade paper will be a real hit.
Supply List:
handmade paper ( see video How to Make Paper: Basic Steps in Papermaking )
Medium Pour Handmold is perfect for a small coin purse or container for small bits and pieces
Large Pour Handmold is the best size for making holders for gift cards
stencils used
Ornamental Petals Screen Stencil by Gwen Lafleur
Decorative Medallion Stencil by Gwen Lafleur
Decorative Folk Flower Stencil by Gwen Lafleur
Acrylic Paint
I used Tim Holtz Distress Paint dabbers in Mustard Seed, Broken China, and Seedless Preserves. (Ranger Ink) If using another type of paint a dabber or sponge will be necessary
Directions:

You are going to need a square piece of paper. A piece of paper like this one, with a torn corner, is perfect. You can measure if you like, but a simple way to make a square is to fold adjacent sides together and trim off the excess.


Fold the paper in half again. Measure from the center to one corner. Fold into 3 equal sections.
Using paper made with the medium pour handmold the measurement was 9 mm. (more accurate than using the inch side of the ruler for this project.) Mark 3 mm apart.
Fold up on the line closest to the middle.
Fold up on the line closest to the middle.

Fold so that point A touches point B as in the picture below.

Fold according to the illustration below to achieve the form in the lower right corner.

Next open the piece up, folding the triangles to the back of the papers as seen below.

The final steps for making the form involve folding the flaps to interlock. Fold up the bottom flap, fold the left flap over the top, the top flap down and finally the right flap will go over the top half and under the bottom half. It's a little tricky, but with a little practice, it gets easier.

Now that you have your coin purse you can either leave it as is to showcase that beautiful paper you made all on its own or add stenciling for another look.
I chose this stencil, by Gwen Lafleur, as it is a great structure to emphasize the structure of the coin purse.

Simply stenciled it has the look of batik which I love. Leave it that way or use an artist marker to sharpen up the lines.

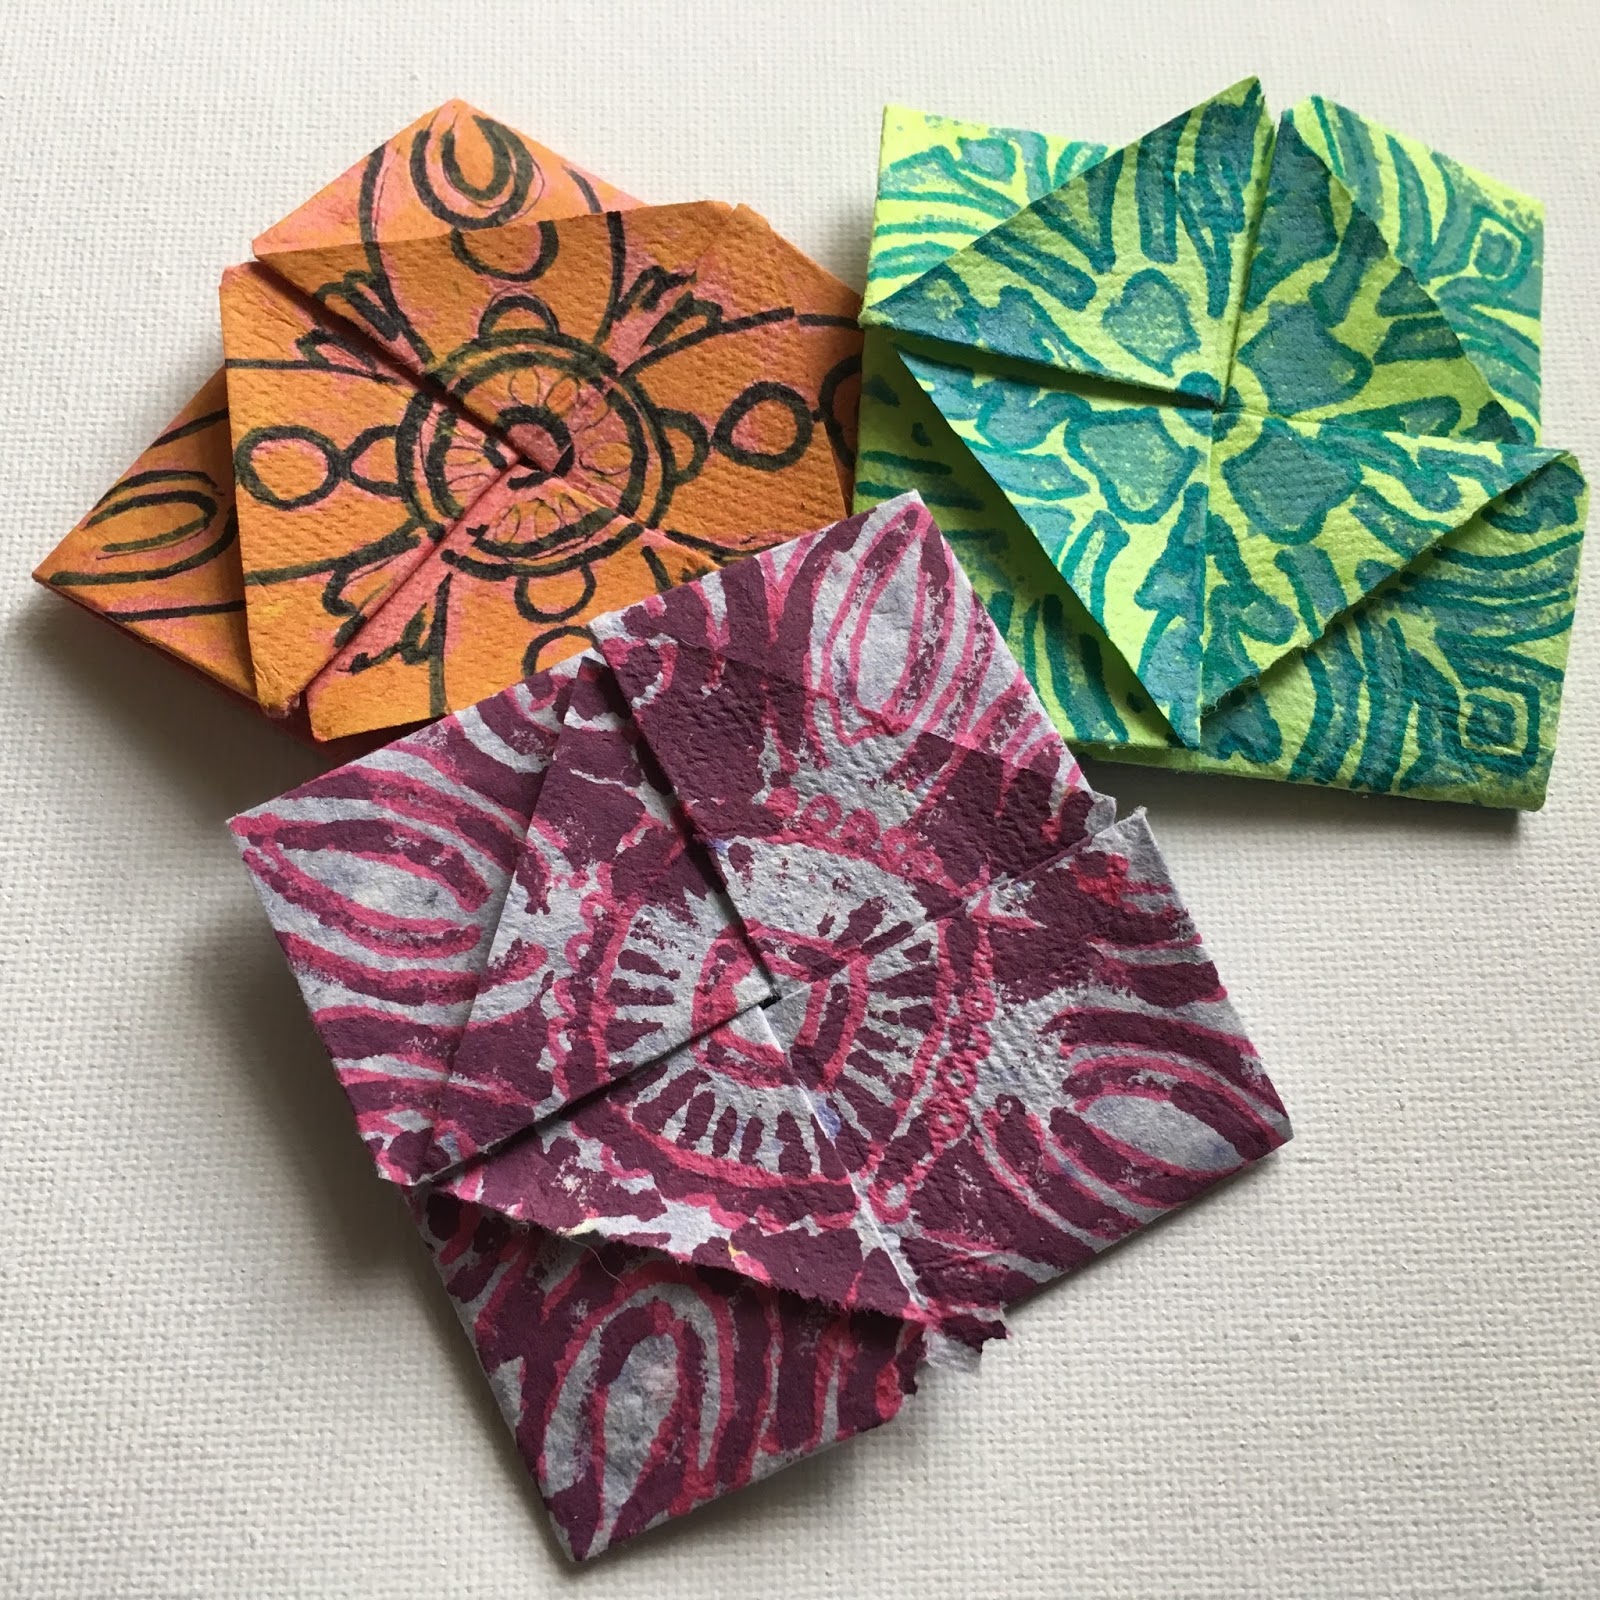
Three different variations of stencils that really work with this structure, all by Gwen Lafleur.
 |
| front side |
 |
| back side |
I hope you will give these a try. I know that once I start making them, it's hard to stop. I hope you will come over to my blog where you can see these on this post:
You may also be interested in my set of articles about Japanese Paper Arts.
Happy folding,
Lynda Shoup


Super cute! These would be great for so many uses!
ReplyDeleteLooking forward to trying this!
Thank you, Valerie! Can't wait to see you try this out and how you use them.
DeleteLynda, I absolutely adore these. I remember my Poppop bringing me one that I saved my pennies in to bring to the candy store. Gwen’s stencils look awesome on your hand made paper. I really need to try this. Hugs,
ReplyDeleteJill, what a wonderful story about your Poppop! I can just envision it. Gwen's stencils were magically the perfect fit. I love the way they compliment the purses. Knowing how talented you are at manipulating paper into moving masterpieces, I look forward to seeing what you do with this.
DeleteLove your Japanese paper arts, they always fascinate me!
ReplyDeleteSandee, you are such a dear! They fascinate me too, truth be told. There is always more for me to learn.
DeleteThese are so adorable! I will have to try making one
ReplyDeleteThank you, Linda. I know you will do something fun with them.
DeleteI am "folding" challenged but think I could actually do these. Thanks for the great instructions.
ReplyDelete