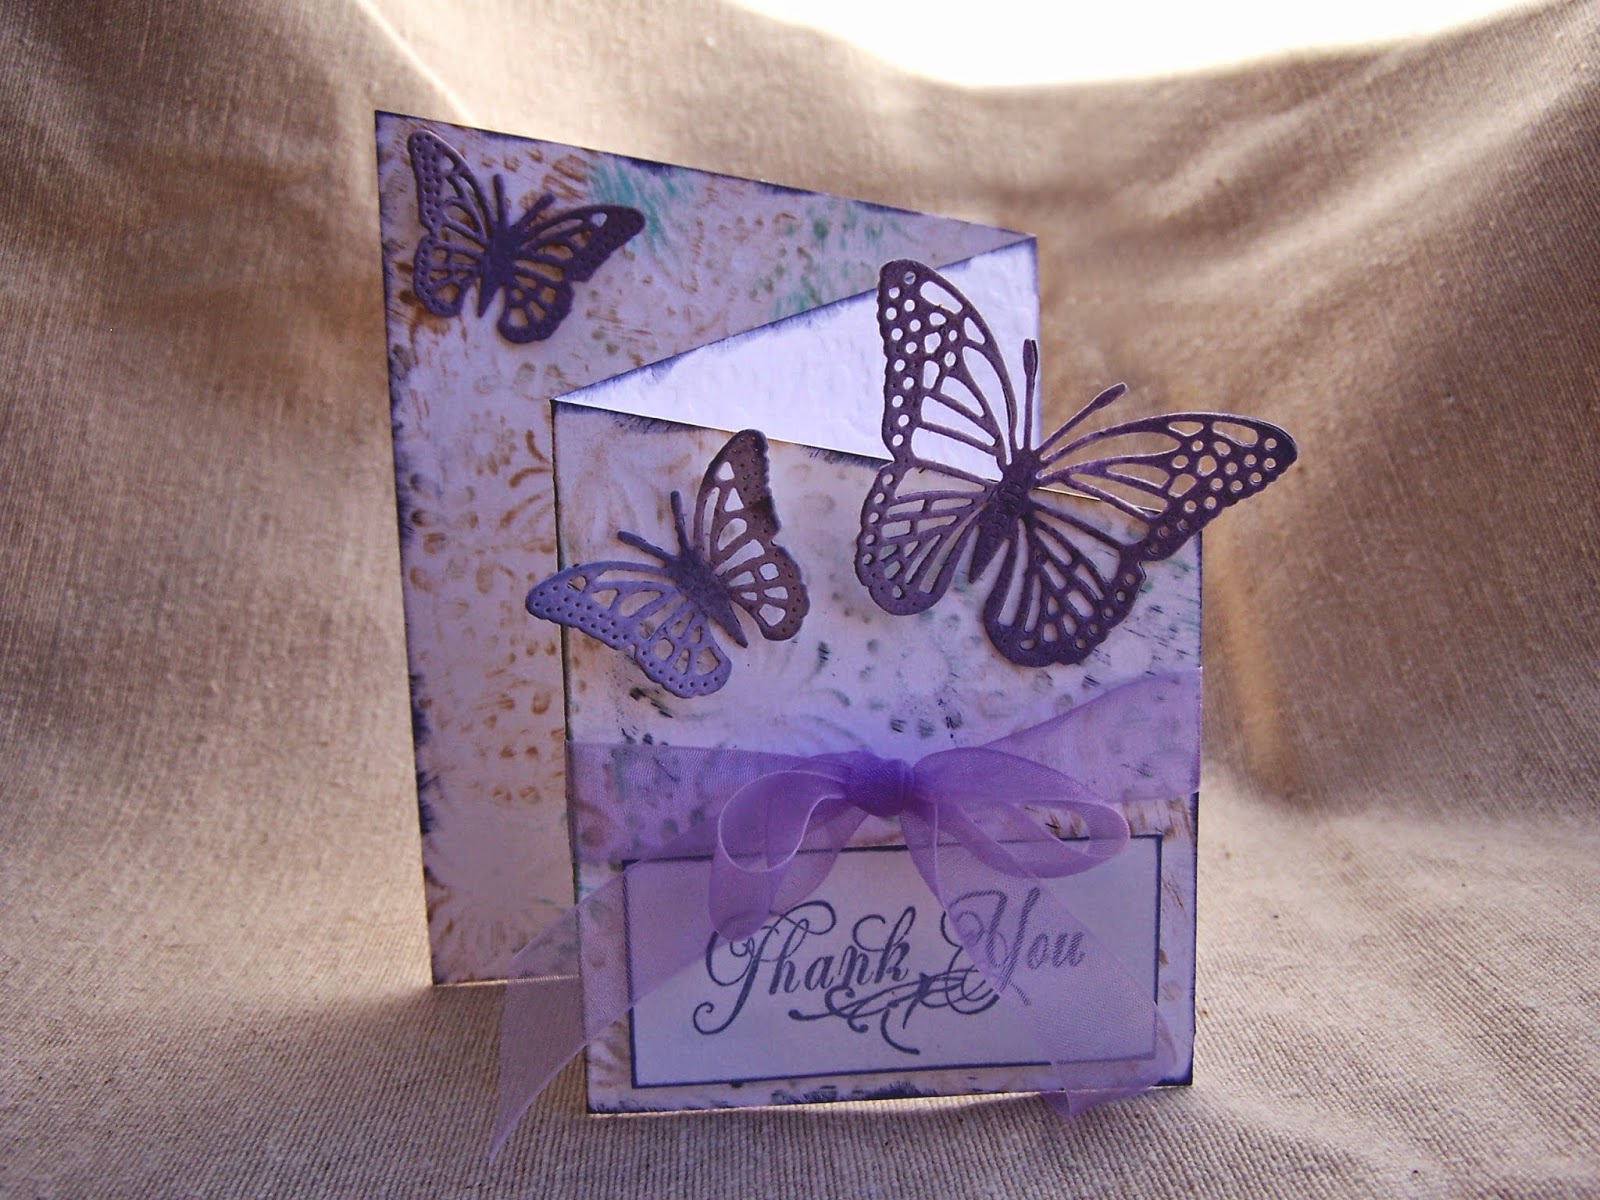
Posts

Showing posts from August, 2014

One Last Thank You

Image
Here is one last look at thank you cards that can be created using beautiful handmade paper.  Thank you for joining the Arnold Grummer design team as we've shared our favorite projects this month.  Be sure to join us next month as we move onto new themes and ideas!    This thank you card was made using 3 sheets of handmade paper.  Each one was created using one of the Papermill Kits  and the basic instructions which can be found under the resources tab on the website.  2 of the sheets were torn to give a distressed look to the clean and simple card base.  The sheets were colored by using some of the Tissue Tints .  The one sheet was created by mixing some leftover pink and blue paper pulps to add an eye catching look to the project.                                                                       There's one more "thank you" from the Arnold Grummer company this month, but don't wait to use it as it will be gone at the end of the day tomorrow.  S

Catch a Falling Star Package Tags by Linda Hess

Image
Catch a Falling Star and put it in your pocket....I know that you are singing along with me!  Make these quick tags when you need an extra little touch on a package or turn it into a notecard by adding a piece of cardstock to the back.  Read on for a super easy how-to. Materials: Papermill Pro Arnold Grummer's Metallic Multi Sprinkles Pinata alcohol ink (Sapphire Blue JFC1017) Shooting Star #710 ( http://arnoldgrummer.com/shooting-star.html ) Premo!Sculpey polymer clay in gold, silver, or pearl Optional: Pentel Metallic Brush pens, Silver Sharpie Place in Blender a handful of shredded paper, 2- 2 1/2 cups water, a few squirts of Pinata ink, and the hefty pinch of Multi Sprinkles.  Blend according to directions with kit (super easy!) and then pour into prepared mold. Follow directions to press out water and form a gorgeous sparkly blue sheet of paper.  Condition a bit of polymer clay and press into the large star only of the texture mold.  NOTE: A small amount

Décor Elements II

Image
©Michele Emerson-Roberts 2014 If you have been saving the scraps from your handmade paper projects or if you have some scraps left from the “Décor Elements” projects here is another great way to use them up and show off your style! This project also makes a wonderful gift, just match the papers and embellishments with the recipient’s style. Supplies: Any of the Arnold Grummer™ paper making kits A sunny window Blender, cello sponges and soft towels Personal paper cutter or scissors and ruler Scraps of white, ivory, beige, tan, and brown paper, or colors of your choice (think junk mail, brown paper bag etc.) OR scraps of neutral colors of handmade papers. (I used approx. 1/3 sheet of 5 different colors of handmade paper) Beacon ZipDry™ Adhesive Disposable brush for applying the adhesive 5 x 7 photo mat with easel back and photo Embellishments: Driftwood, river stones, twigs, natural feathers rusty wire or metal shapes,

Use Handmade Paper to Create A Beautiful Gate Fold Card

Image
Send a little sunshine to someone with this gate fold card made from handmade paper card.  The gorgeous texture of handmade paper adds one of the best elements to any project.  It's great for embossing and die cutting, too! This card was created by making 3 sheets ( 2 white sheets and 1 yellow) of handmade paper using one of the Papermill kits and the basic instructions.  One of the white sheets had some of the Opal Sprinkles added to the pulp for a little sparkle.  This sheet was used for the die cut piece.   The beautiful pale yellow color was made by adding some of the Tissue Tints to the paper pulp.  Once the sheets were dry, the first sheet was cut to measure 4 1/4" x 8 1/2" and then scored at 2 1/4" and 6 1/2" and then folded on the score lines. They should meet in the middle.   The two yellow panels were cut to measure 1 7/8" x 4" and embossed with an embossing folder and then adhered to the card base.  The inside of the card was finishe

Give A Big Thank You with Handmade Paper

Image
There's nothing better than receiving a thank you for something you've done.  Give someone you know a big thank you with this card made from handmade paper.  The texture of the paper adds a beautiful element to the simple design. Create the thank you template using your printer and a word program and cut it out by hand or use your favorite die cutting machine to create the template. Make a sheet of paper using one of the Papermill Kits following the instructions that are included and allow the paper to dry. Trace the words onto your sheets of handmade paper and cut them out.  It's that easy to do!  Make a second piece of paper for the card base and give it a little color by adding some of the Tissue Tints .  Add the 'thank you' and finish it off using a couple of corners from the first sheet to add to the corners.  You are now ready to send a big thank you to someone. Cards don't need to be complex and complicated to send a message.  Sometimes the messa

Décor Elements

Image
©Michele Emerson-Roberts 2014 In my last project I talked a bit about textures and how they are everywhere in the home décor market. I love creating my own decorative accent pieces, using my color palette and rustic style. This is a great project for using up some of those “scraps” I keep telling you to save - yep even the tiny ones can be used for this project. So let’s get started. Supplies: Any of the Arnold Grummer™ paper making kits A sunny window Blender, cello sponges and soft towels Personal paper cutter or scissors and ruler Scraps of white, ivory, beige, tan, and brown paper, or colors of your choice (think junk mail, brown paper bag etc.) OR scraps of neutral colors of handmade papers. (I used approx. 1/3 sheet of 5 different colors of handmade paper) Beacon ZipDry™ Adhesive Disposable brush for applying the adhesive 3-5 Styrofoam™ 3” balls One large plastic plate or bowl Embellishments: Driftwood, river stones,

Memory Book

Image
An option for themes this month is a "vacation summer memory book". My idea was to create a small book using various leftover handmade papers that I processed and went unused. This small booklet could be used for snapshots of special summer moments or to layer in hand written notes for remembrance. Each of the pages are different as the photos show: (NOTE: The front cover is made from a sheet similar to page 1 and it's look changes entirely with the wax added.) Page 1-Embedded paper  resin shards Page 2-Texturized sheet Page 3-Recycled scraps Page 4-Colored pulp painted edge Page 5-More recycled scrap papers Page 6-Recycled from scraps Back Cover-Extra thick sheet made from scraps A sheet of handmade paper, with resin covered dictionary pages that are embedded into the sheet, was used for the front cover.  Wanting to make the cover take on a different look, I coated the paper with melted beeswax

HOOO's Ready 4 School?? by Linda Hess

Image
Hard to believe that the start of school is just around the corner!  Where on Earth did the Summer go?!  I hear the sounds of that old Staples commercial playing in my head..."It's the most wonderful time of the year" (yes, I know it is now playing in your head as well...you are welcome :-) With Back-To-School firmly implanted, I started on design jump started by a journey to the craft store.  I wandered onto the soap making/resin aisle (don't ask me how I got there) and I found the BEST mold, an owl!  I had to have it as an idea had already jumped into my head and as we all know, once the idea is there it has to get out.  The only way to accomplish that is by running to the studio and creating.  Off to the studio.... Up first, the background.  I could see a blue sky, possibly a little twinkling of stars (after all when are the owls active??).  Using my Arnold Grummer's Papermill Pro I went to work.  Into the blender I mix a couple of handfuls of shredded pa

Terrific Textures

Image
©Michele Emerson-Roberts 2014 Texture is everywhere; heavily woven fabrics for home décor, embossed wallpaper and leather, woven baskets, and Anaglyptic tiles and bark cloth boxes are just the tip of the iceberg! How would you like to easily add some textures to your paper projects? Handmade paper embosses so easily! The embossing folders and plates available today include simple to elegant designs and are so easy to use. Follow along to create this quick and simple “thank you” card. Note - I like to create many sheets of paper at a time and emboss them with different folders to have on hand for later projects. If you don’t have access to embossing folder/plates try using the net bags that many vegetables and fruit come in. Great designs, and they are free! Supplies: Any of the Arnold Grummer™ paper making kits A sunny window Blender Cello sponges and soft towels Personal paper cutter, scissors Scor-Pal™ Beacon ZipDry™ Adhesive, or double sided tape, foam

Memory Keeper Photo Frames

Image
I love sharing pictures of family, and decided to make these special by presenting them in frames covered with handmade paper. I used the Arnold Grummer's photo frame set . Everything you need to construct the frames comes in the kit, except the paper you use for covering. I followed the easy directions that are included in the kit. I selected handmade paper to cover the frames. I used a liquid glue to adhere the paper to the frame. I used small binder clips to hold the glued edges in place while the glue dried. Since handmade paper tends to be a bit softer that regular paper or cardstock, I protected the front of the frame with waste paper where I clipped the glued edges in place so the clips wouldn't dent the paper. I embellished one frame with rolled roses made from the scraps of the paper I used to cover the frame. For the other frame I embellished with leaves that I dried using the Arnold Grummer's garden press . Here are the finished frames, ready to

Lavender Butterfly Thank You Card

Image
©Michele Emerson-Roberts I made this card for my “baby” sister as a small token of my thanks for everything she does for our parents--every day. After spending a week in Texas working side by side with her cleaning and rearranging our folks’ house, I’m reminded how much of a saint she is.  Supplies: Any of the Arnold Grummer paper making kits Blender, small strainer, cello sponges and soft towels paper cutter, scissors, Score-Pal & bone folder, ruler, utility knife and cutting pad Quick Grab™ Adhesive, double sided foam tape or foam dots Scraps of lavender colored and white paper White cardstock 8 ½ x 11” and scrap 2 ¾ x 1/14 (or whatever size to fit your choice of verbiage stamp) Dies: CheeryLynn™ Butterflies Butterflies and Flowers embossing folder Spellbinders Grand Calibur™ Machine Verbiage stamp 12 “each of 1” sheer Lavender ribbon ColorBox™ Chalk Ink pads in Lavender Blue ColorBox™ Stylist handle