Posts

Showing posts from March, 2016

Handmade earrings from handmade paper

Image
 It is finally Spring, according to the calendar, but we had snow a few days ago! I have no idea why it does that because the next day it is warm enough to melt it all but living in the Midwest, our weather changes constantly. Today I have earrings to show you. I used scraps of leftover paper to make them. I use my punches shown below...  And then glued them together using Helmar's Tacky Craft Glue but not before coloring them using my Pitt Pens, I love making jewelry using different elements besides wire and beads. To make them strong enough to wear, I spread a layer of Glossy Accents onto them and let that layer dry before adding another. Thanks for stopping by and don't forget, you too can make your own handmade paper using the Arnold Grummer paper making kit and directions here .

Winter….Summer

Image
©Michele Emerson-Roberts  2016 Enough already! I’m ready for some warmer weather! The fruit trees are starting to bud, then we have another freeze! This is confusing for the trees and my body… smile. When I remembered this stamp from IO, it expressed what I was thinking. BTW: I’m really having fun with these backgrounds. They almost create themselves. Supplies: Any of the Arnold Grummer   paper making kits A sunny window Blender, small strainer, cello sponges and soft towels Scraps of blue and ivory or white paper (think junk mail, etc.) Die:    Impression Obsession   Dragonfly #DIE253-U Spellbinders   Grand Calibur™ Die cutting & Embossing Machine Westcott™   paper trimmer & scissors Beacon ZipDry TM   adhesive DecoArt TM   Media Fluid Acrylic™ & Mister (shades of blue) Sea sponge Stamp:   Impression Obsession   “Winter/Summer” #D13353 ColorBox™   Chalk ink pad blue (to match the handmade paper color) Iron if you want the paper to be smooth

Ribbon Book Binding

Image
© Anne Rita Taylor 2016 We had interesting themes when we swapped handmade books online a few years ago. It was always fun seeing what each person made. The books had content, except when we would have a Blank Book Exchange or a How-To Book Binding. The How-To Book Binding theme always received the most participation! We included the paper and instructions. I sent the Ribbon Binding - pretty and an easy book to make. It requires only 4 pages with a cover, plus a good amount of ribbon. Especially good for using leftover hand-made paper scraps. Supplies:  Arnold Grummer Paper Making supplies .  Arnold Grummer Paper Making how-to . Cover: 5 1/2 by 8 inches, folded in half to 4 inches by 5 1/2 inches Paper : 4 pages 5 1/2 by 8 inches, also folded in half - I used stationery with roses on the edges Pretty Hand-made paper: 3 by 4 inches - Paper that I made with flower inclusions Optional paper for framing the handmade paper on the cover: 2 1/2 by 3 1/2 Ri

Let me Be A Feather

Image
Good Morning! Welcome to a new week and Spring!! Remember the colorful envelopes I made paper from in my last post? I had some leftover paper which I decided to use for a canvas. I used a pretty pink piece of paper for the background. I printed the quote directly onto the paper. Yes, it went through my printer just fine. I am okay with the smudge or two that it does have. I Mod Podged the background to a 5 x 7 flat panel canvas. I hand cut leaves from several of the other colors and added a beaded tie. This was glued to the background. I find this quote to be inspiring and have this hanging above my desk. Don't you love the way it looks? Remember - don't just save those birthday cards! Save the envelopes too!! Supplies used: Pour Handmold available at Arnold Grummer Have you tried getting different color handmade papers? This is one way to achieve that! Thank you for visiting the blog today. Don't forget to also visit us on  Facebook  and be sure

Safe Travels

Image
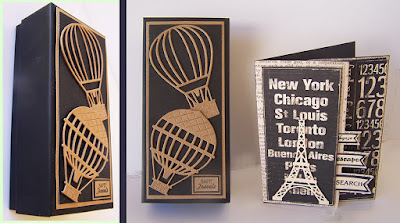
©Michele Emerson-Roberts 2016 My favorite nephew graduates this May with a double degree Geology and “land management”.  He is following his dad’s and grandpa’s footsteps and going into the oil business. He will be working towards an MBA next! I wanted to make something special for his graduation, and since he’ll be taking a long trip, I think the little travel box will come in handy for him. Following Arnold’s philosophy of “repurpose, restyle, revamp, restore, renew and recycle is such fun!    Supplies: Some ivory heavy weight handmade paper left over pieces Tan chipboard (I used the back side of a cereal box) Black card stock for card base (4 ¼ x 5 ½ folded) scrap for layering, envelope Graphic 45   Topography papers for layering Recycled small rectangle black box (I used an eyeglass frame box) Dies:    The PaperCut™   # PCDIE019 Triple Flag (Card Making set); #PCDIE020 Triple Flag Layering set; Joy Eiffel Tower #6002/0486;   Ch

It's all in the blending

Image
Paper making never ceases to amaze me, I love all the different textures and looks that you get with handmade paper. Sometimes it's just the way you blend your paper that gives you these wonderful effects. Although the 2 papers on the card might look like they came from different papers they actually started out from the same tissue paper that I re-cycled into newly handmade paper. ( how to make hand made paper ) This is some tissue paper that a friend had wrapped up a present for me in. ( I was as equally excited about the tissue paper as I was the gift, but let's not tell her that. She might just start giving me tissue paper instead of a present, lol ) By alternating the speed and the time in your blender you can get different looks from one sheet of paper. The one of the left was blended for a longer time while the one on the right was "pulsed" in the blender.  Have you experimented with blending your papers to see what different looks yo

Easter Card

Image
Easter is right around the corner and so is Spring. I am so ready for Spring this year not that we have had a bad winter but I always love Spring. Today I have an Easter card I made from handmade paper. When making handmade paper, think junk mail or something you no longer need to keep in your files and blend them up with a blender and water. You can find everything you need to make your own paper  here . I used an old Easter stamp I have had (can't remember where I got it and it has no manufacturers name on it), then colored it with Faber Castell PITT big brushes. Hope everyone has a wonderful Easter with their families and friends.

Celtic Bookmarks

Image
©Michele Emerson-Roberts 2016 Wow! It is hard to believe that it is already March! Where did January and February go? Several family members have birthdays later this month so I had better get busy. Lucky for me I already have a stash of handmade paper to grab, but in case you don’t, follow the instructions below. The bookmarks are quick and easy to make, and are always a big hit with the book lovers in my Irish heritage family. Supplies: Any of the Arnold Grummer paper making kits A sunny window Blender, small strainer, cello sponges and soft towels Scraps of white/ivory and green paper (think junk mail, etc.) Dies:  Tonic #184 Celtic Dreams Collectable Set  Tonic Tangerine™ Die cut and embossing machine Tonic Advantage V blade paper trimmer & scissors Scor-Pal™ Tonic Craft Tacky™ adhesive 12” each of Winter White seam binding, olive green Organza ½” ribbon, and fibers for each bookmark ¼” round hole punch Iron if you want the paper smooth Inst

Explosion Birthday Card

Image
©Anne Rita Taylor 2016 The month of March is definitely a birthday month. My sister Margie, my friend EJ, and my niece Jacqueline all have birthdays this month. A fun card to make has Arnold Grummer Skeleton Leaves on the front. Inside I used a fun origami explosion fold, also called the Turkish Map Fold. Supplies:  Arnold Grummer Skeleton Leaves 8 1/2 inch square  piece  of paper Arnold Grummer Handmade Paper Arnold Grummer Handmade Paper instructions Folded card - 4 1/4 x 5 1/4 inches Celebrate It 360 “Happy Birthday” ribbon from Michaels Happy Birthday rubber stamp from Joann's Bone Folder, awl Recollections Leaf brad and tiny brad PVA glue Sizzix Texture Boutique Embossing Machine Sizzix Textured Impressions Embossing Folders Inside page instructions: Fold your 8 1/2 square paper in half - use your bone folder for good creases Turn over and fold diagonally each way Push it together Fold each triangular corner to

Don't Throw That Away

Image
You just had your birthday and your friends and family sent/gave you beautiful cards. Of course, those go in a drawer to be kept but the envelopes? DON"T THROW THEM AWAY!! Look at all of the beautiful colors! Those will be perfect for.....something made with paper! My sister's birthday is this month. Given that I made my other sister the Seed Bombs, I thought it only fair that I make this sister something as well. I decided to use those pretty color envelopes and make FORTUNE COOKIES! I thought these would be fun for her to have and open in the coming days. I made pulp and set up my Pour Handmold.  I used a biscuit cutter to make the circle shapes. I set it on the base of the mold, poured a layer of pulp in, waited for the water to run out then gently lifted the biscuit cutter to another location  and repeated the process. I proceeded to remove the water from them as I would for a piece of paper.  I let the circles dry some but needed them still

“Amaze……..Butterflies”

Image
©Michele Emerson-Roberts 2016 I am amazed every year when the flowers and trees start to bud and the many varieties of butterflies appear. They dance among the flowers and light sometimes to examine them closely. It is delightful to watch them. Supplies: Any of the Arnold Grummer paper making kits A sunny window Blender, small strainer, cello sponges and soft towels Scraps of ivory or white paper (think junk mail, etc.) Dies:  Tattered Lace™ Butterflies  D466 Spellbinders TM Grand Calibur™ Die cut and embossing machine   Red cardstock for card base (card is 4 ¼ x 5 ½” folded)   Envelopes to fit card Blue and red scraps for die cutting Stamp: Crafters’ Companion TXT-ST Word 2-EZ “Words of Wonder 2 ColorBox™ Medium blue Chalk ink pad Westcott™ paper trimmer & scissors Scor-Pal™ Beacon ZipDry TM adhesive DecoArt TM Media Fluid Acrylic™ & Mister (reds & blues) Sea sponge Iron if you want the paper smooth