Posts

Showing posts from February, 2015

Cherub Votive

Image
©Michele Emerson-Roberts 2015 Spring is just around the corner and things are beginning to bud here in SE AZ. We are lucky to have lots of sunshine and a long growing season. Thinking ahead to the delicious fruit and vegetables that my husband Charles grows every year inspired this project. I have a perfect place for it on the dining room sideboard. Supplies: Any of the Arnold Grummer™ paper making kits Arnold Grummer Cotton Press Cherub casting mold Microwave, heat tool or a sunny window Blender, cello sponges and soft towels Scraps of white paper (think junk mail, etc.) Pastels, chalks or powered eye shadow (if you want to add a tiny bit of color) and applicator (cotton swab) Faux fruit candle ring Long steamed wine glass Battery operated votive candle Beacon QuickGrip™ Adhesive Instructions: Follow the directions found in any of the Arnold Grummer™ paper making kits to cast two of the Cherub molds. When

Tag.. You're It with Tamiko..

Image
I have to say I didn't create any handmade papers today.. (insert - Awwwwe!)  Only because I have created a decent size stash to play with (Yeah buddy!!) Well for a very little while.  I mean.. do you EVER really have enough paper when you are a serious paper crafter? (smiles)  I wanted to play and color on my handmade papers.  I think when you art on top them they add such texture and detail, even before adding color.  Here is a tag I did.  It was such fun to play.. and watch as things as it came into fruition. The supplies I began with were only made possible after using any one of the   Arnold Grummer Paper Mill Kits  to create the papers of your dreams. (smiles)  After you have those, you then need: XL Manila Tag Prima, Bloom Girl Summer Stamp Ranger Archival Ink Pad- Jet Black Lindy's Stamp Gang Magicals -Autumn Leaves Sakura Water brush Helmar Craft & Hobby PVA Glue Embellishments Scissors Americana Multi-Surface Satin Acrylics- Ball Roun

"Wishes for Spring" Vase designed by Linda Hess

Image
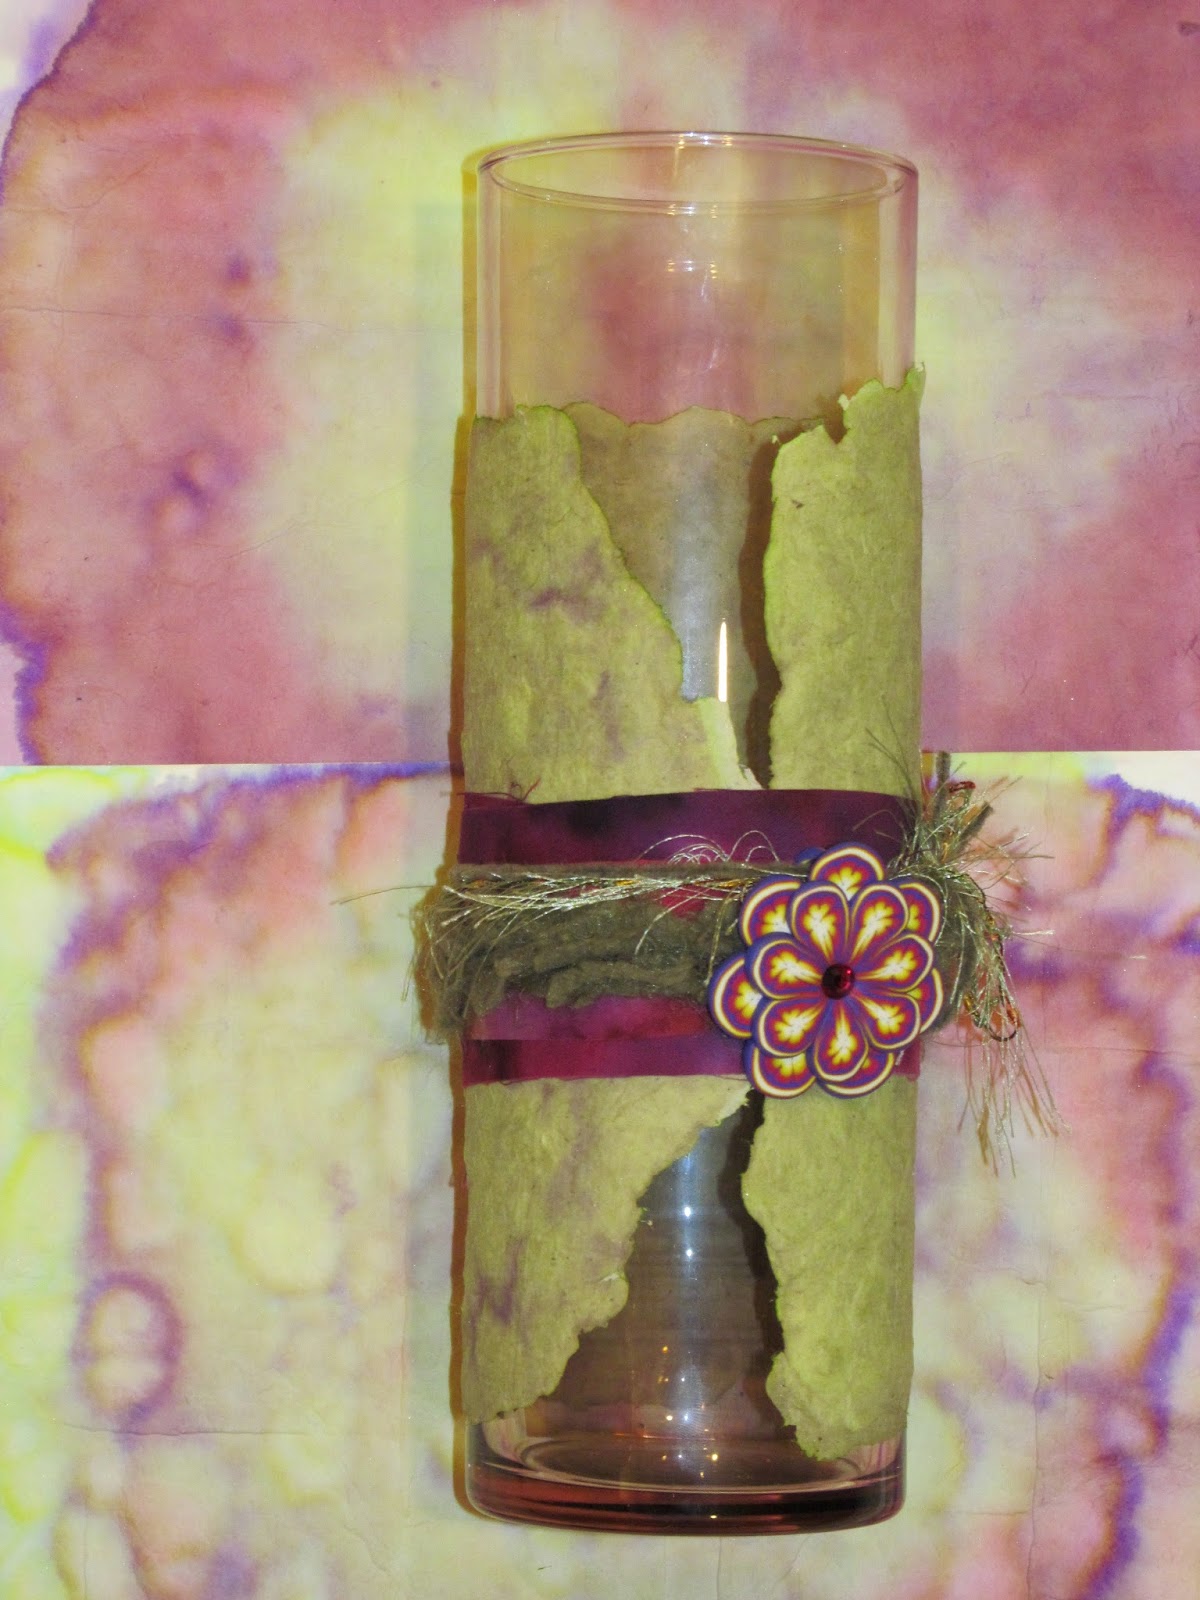
BRRRRR! the East Coast has had more than its share of winter weather this year.  I thankfully live in VA where we have felt the bitter cold, but have dodged many of the snow storms...that is until last week.  With the snow and ice in the process of melting I find my mind wishing for spring temps, buds popping, and flowers blooming.  What better way to coax the season out of hiding than with a vase design??  super easy to do AND (even better) I have done a bit of experimenting for you so that you can skip over my boo-boos and go straight to gorgeous results. Materials: Arnold Grummer's Papermaking kit (I use the Papermill Pro) Arnold Grummer's Paper Tints Arnold Grummer's specialty pulps ( white cotton rag pulp) LuminArte' Pure Color in Olive Vine ( www.luminarte.com ) Glass column vase Batik craft yarn by Princess Mirah Design ( www.batikbymirah.com ) fibers from my stash Optional: Buttons, dried flower sprigs, polymer clay flowers Procedure: 1)  My

Going Green

Image
©Michele Emerson-Roberts  2015 All this talk these days about “going green” makes me smile. The Arnold Grummer Co., family and friends have been “green” for decades. Not only are we “green” by recycling, repurposing, and re-using, we are adding to the “green” in our wallets by making our own paper from items most people consider trash. What a winning combination that is! With March’s Saint Patrick’s Day coming up, what better time to gather all those odds and ends of green scrap paper and get started on an Irish project or two. Supplies: Any of the Arnold Grummer paper making kits Molds: R 004 Scottish Thistle, R 434 Celtic Harp, R 470 Celtic Knot Work, R 497 Celtic Flourish Microwave, heat gun or a sunny window Blender, small strainer, cello sponges and soft towels, paper cutter, scissors, bone folder, ruler Beacon Quick Grip™ Adhesive, double sided foam tape or foam dots Scraps of green and white paper (think colored junk mail, etc.)

Pushpin paper charms

Image
Hi everyone! As promised I am going to show you how easy and fun it is to take some junk mail and turn it into a brand new useful object....a pushpin, along with the Mini assortment casting mold.  You might remember that I made a Charm-ing paper heart banner the last time and used the coordinating pushpins to hold it up with. To begin with you need to make some paper pulp   by "tearing up some paper and putting it into the blender with water. Run the blender for 30 seconds or less, turning the paper into pulp."  trash-to-treasure-papermaking book  p. 31 Here is a short video I made to show you the few extra steps I added to the paper casting and it was very simple to create! By using the steps that are outlined in the trash-to-treasure-papermaking book on pp.130,131 for making a paper cast you can see how to create your own pushpins. ( There are quite a few wonderful books available and you can save 20% right now by using this code to shop with!

Seed Paper Flowers

Image
Hello!  It's Ann from Annmakes here today, for the Arnold Grummer Paper Making Design Team. I have had fun playing recently with this fun kit geared towards school aged children, The Arnold Grummer's Seed Paper Flowers Paper Making Activity Set, available through this link. http://arnoldgrummer.com/seed-paper-flowers-classroom-kit.html  (Use coupon code Two20 and save 20%) I made this windowsill planter tray: In addition to the Arnold Grummer Seed Paper Making Kit you will need an empty jar, a tub or container, and some water.  The kit comes with complete easy to follow instructions. ( Over on my blog I list the other materials I used to create this specific project.) Here is a video that gives you an idea of how I made these flowers. I hope that you have fun making seed paper too.  Come visit my blog , please.  Thanks for stopping by.  Keep Craftin'!

Say I Love You With Handmade Paper

Image
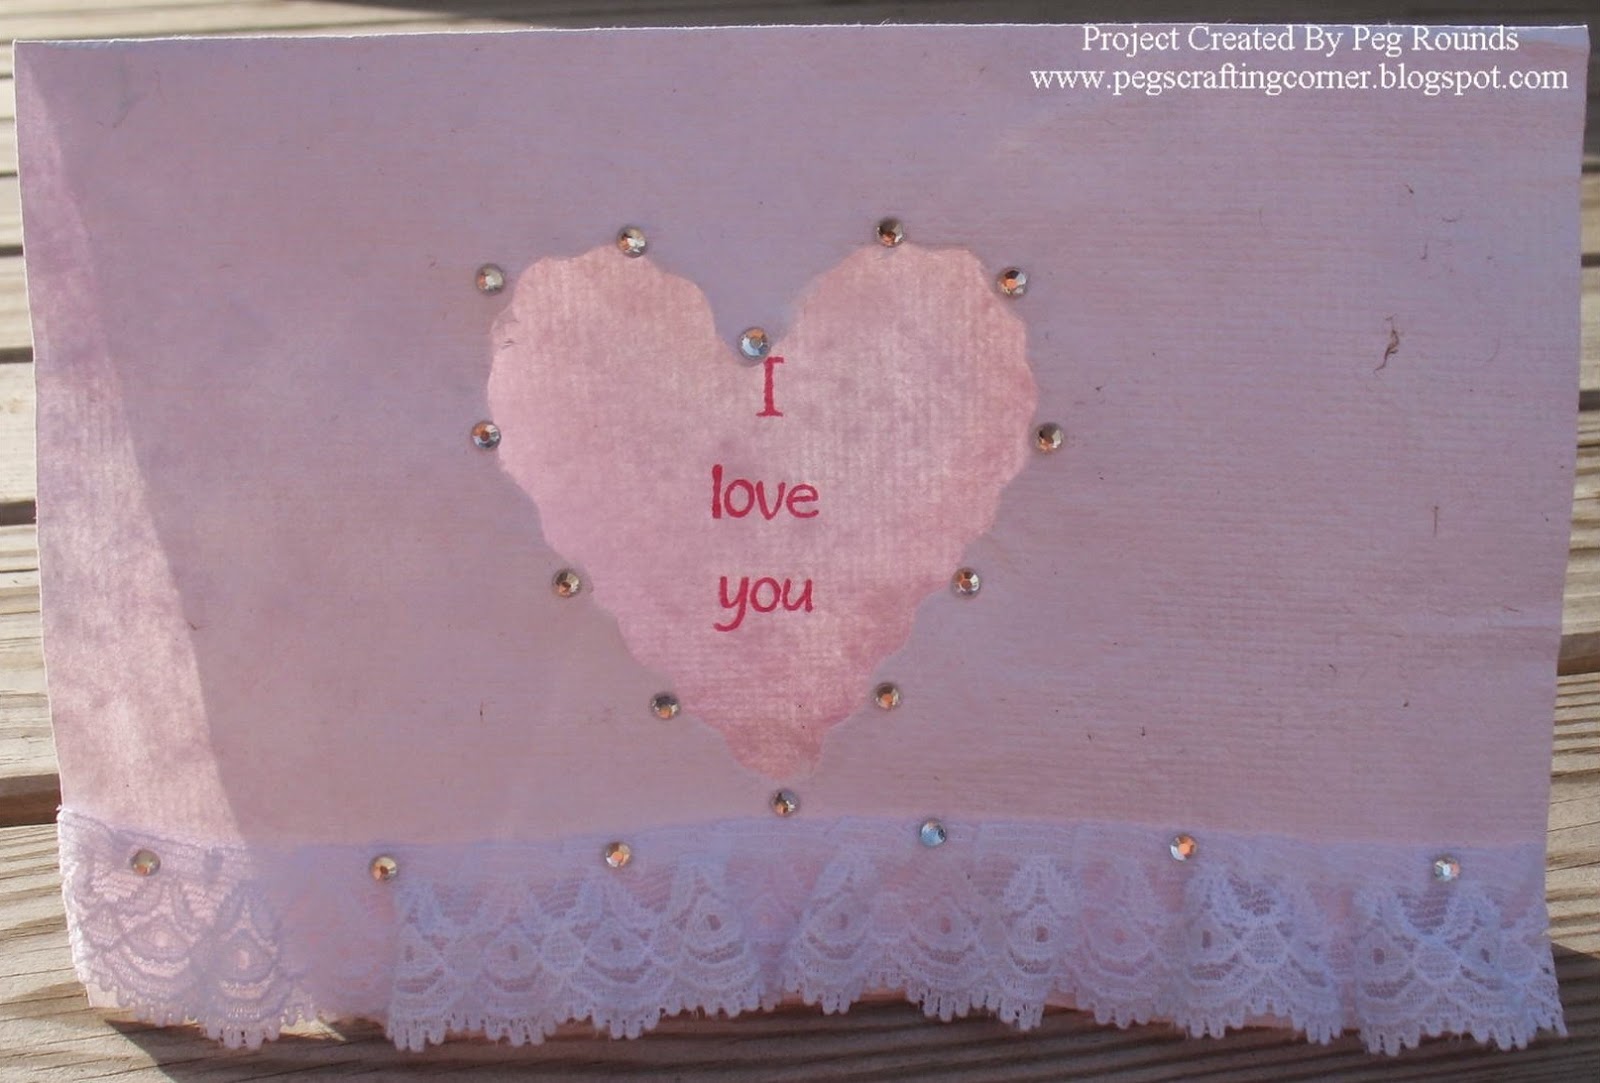
Last month I wrote a post entitled, " Love Notes ,"  on how to use a cookie cutter to create a solid heart in a piece of handmade paper.  Today I would like to show you another way to create a negative area in a sheet that can be used as a window in a card.  There is just something special about saying, "I love you" with a sheet of handmade paper.      Begin by making the paper pulp in a blender to create the sheet of paper.  If you'd like to have a colored sheet of paper add some of the  Tissue Tints for color.   Place the cookie cutter inside the deckle, which is included with the Papermill Kit , making sure that it is positioned in the lower part of it so that you have a foldable sheet of paper when you are finished.   Now, carefully pour the pulp around the outside of the cookie cutter.  If you do have a little that gets inside of it simply lightly rub your finer over the area to roll the pulp up and remove it with your fingers.  Remove the d

Tea Dyed Heart Card

Image
©Michele Emerson-Roberts 2015   When you are in a hurry but really want a card that looks like it took a huge amount of time and effort, combine some Graphic 45™ paper and a tea dyed heart casting for a spectacular look! Make up dozens of different castings a head of time and assemble the cards in under 5 minutes! Supplies: Any of the Arnold Grummer™ paper making kits   Microwave , heat tool or a sunny window Heart casting mold Blender, cello sponges and soft towels Scor-Pal™ Westcott™ personal paper cutter and scissors 10 x 7” cream colored card stock folded to make a 5 x 7” card Envelope for the 5 x 7” card Vintage themed Graphic 45™ “cut a part” card stock Beacon QuickGrip™ Adhesive, double sided foam tape or dots Scraps of white or off white paper (think junk mail, etc.) Instant tea or coffee 12” of cream colored ¼” satin ribbon 5 x 7” floral themed embossing folder Spellbinders ’ Grand Calibur™ machine

Love Me Tender..

Image
Happy Wednesday good people!!  Seemed only appropriate to do something for Valentine's Day, which happens to be this Saturday.. ::insert sappy-like music here::  (chuckles) I am having a ball learning about creating my own papers.  This week I even added *inclusions* (that's when you add things to your pulp y'all)  I added some dried roses I had received from a friend, Tommy Jo, who is a fantastic artist and soap maker!! Let me show you the accordion book I made! I have 2 different types of papers here.  The pink paper was from a previous batch of tissue papers, napkins and soda can boxes.  The green is my rose batch.  Here's a list of the supplies I used to create my project for today..  Any of the  Arnold Grummer Paper Mill Kits Arnold Grummer Zig Zag Book Dried roses Blender Water Pearl Ex- Green-Yellow and Red-Blue Perfect Medium  Brush Helmar Craft & Hobby PVA Glue Fiber/Yarn Paper Flowers (to embellish) scissors I first began with

"My Heart Chose You" by Linda Hess

Image
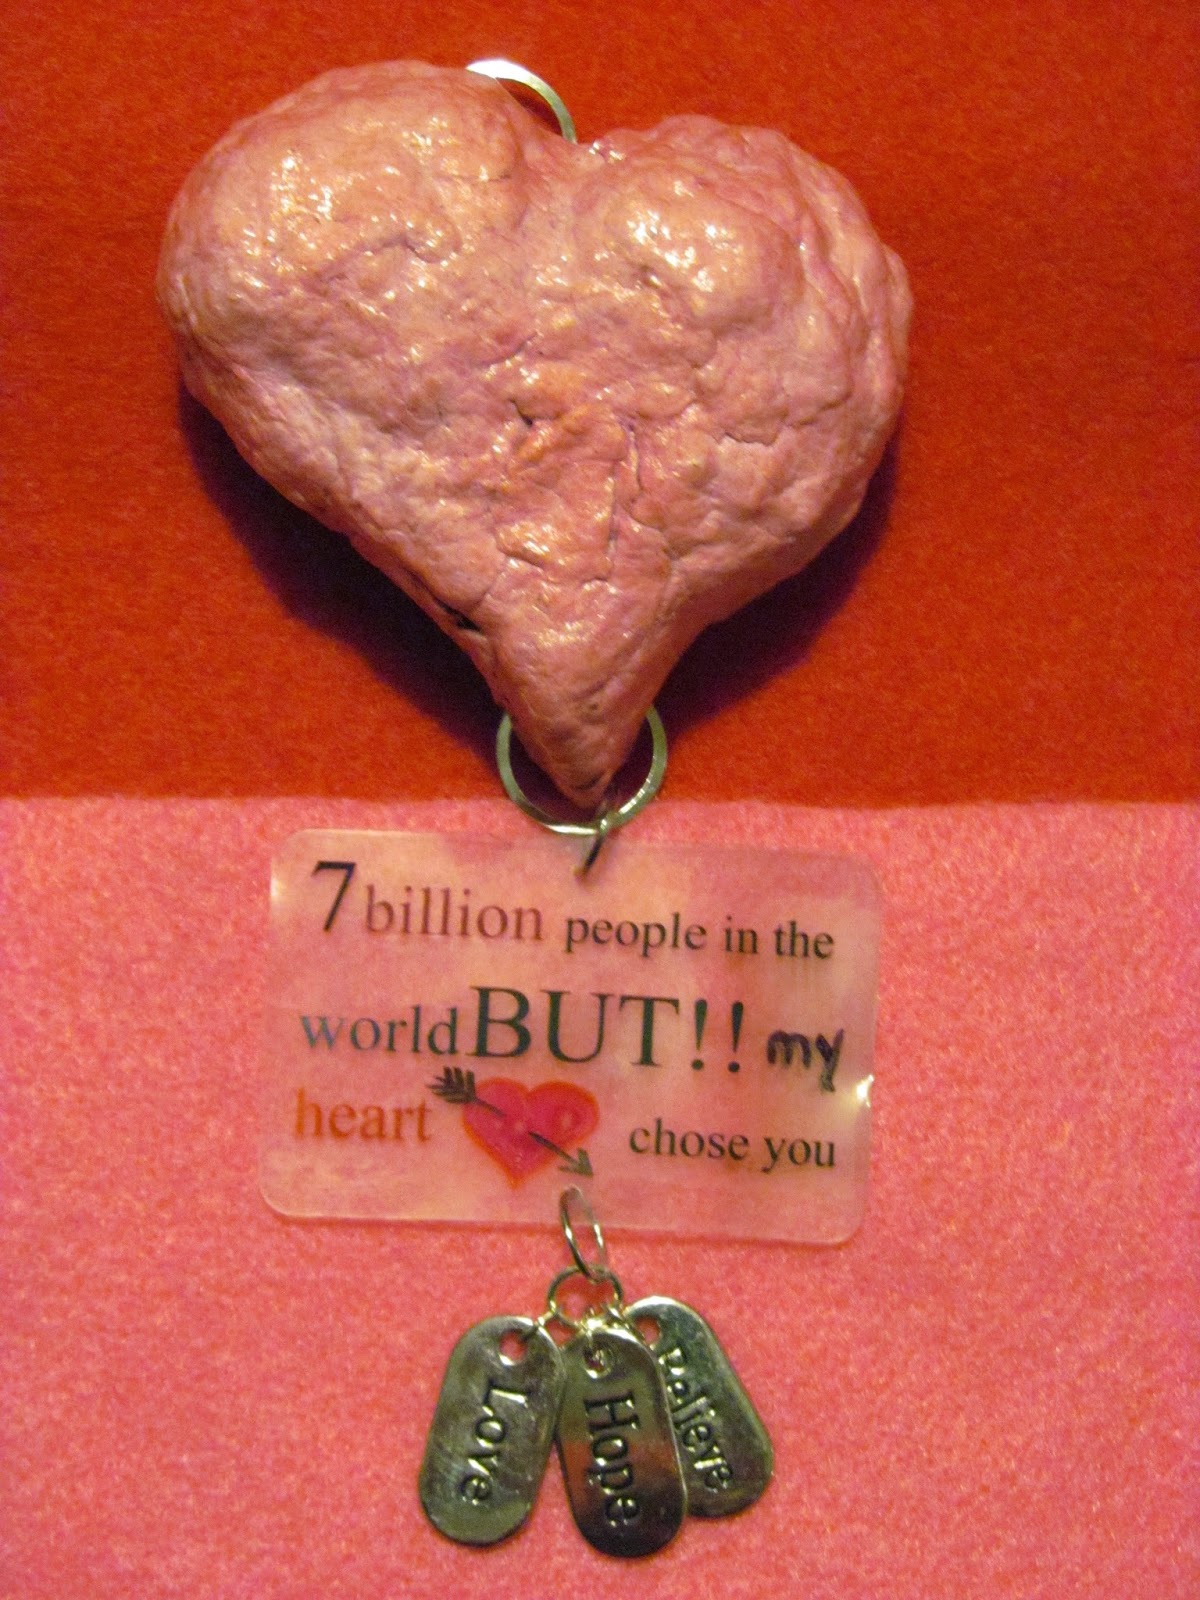
With Valentine's Day quickly approaching, I am trying to come up with a little something for my husband of almost 27yrs.  After that number of years he knows what is in my heart, but I still like to show him with unique pieces.  This year I had a puffed heart came to mind...hmmm, with a note hanging from it perhaps??  Off to work I go... Materials: foil Arnold Grummer's Paper Making kit ( www.arnoldgrummer.com ) Mod Podge The Ultimate glue ( www.crafterspick.com ) ShrinkyDinks ( www.shrinkydinks.com ) chain jump rings assorted charms ( www.michaels.com/beadlanding ) To create a puffed heart I began with a sheet of foil.  Carefully crumple it between your hands to form a loose ball, then shape the ball into a heart.  A little press here, a dent there, a pinch at the bottom and your heart will take shape.  Once the form is complete, it's time to make a sheet of paper. Last month I created multiple jars of pulp ( https://polymercreations4u.wordpress.com/201